
How to Create and Launch a Meme Coin on Base in 2025 — Step-by-Step Guide
Learn how to create and launch your own meme coin on the Base network in 2025 using our no-code platform. Fast, easy, and perfect for beginners and creators alike.
Why Launch a Meme Coin on Base in 2025?
Meme coins have taken the crypto world by storm — from community-driven tokens to viral sensations, they’ve proven that humor and hype can hold real value. With the rise of new blockchains like Base, launching your own meme coin has never been more accessible or cost-effective. Whether you’re building the next big crypto joke or a serious community experiment with a fun twist, this guide will walk you through the process step by step.
In this tutorial, you’ll learn how to create and launch a meme coin on the Base network using our platform — no coding required. We’ll cover everything from token settings and design to deployment and promotion, so you can bring your meme coin vision to life in just a few clicks.
Let’s get started!
Step-by-step instructions
Step 1: Visit CoinFactory Base Meme Coin Creator
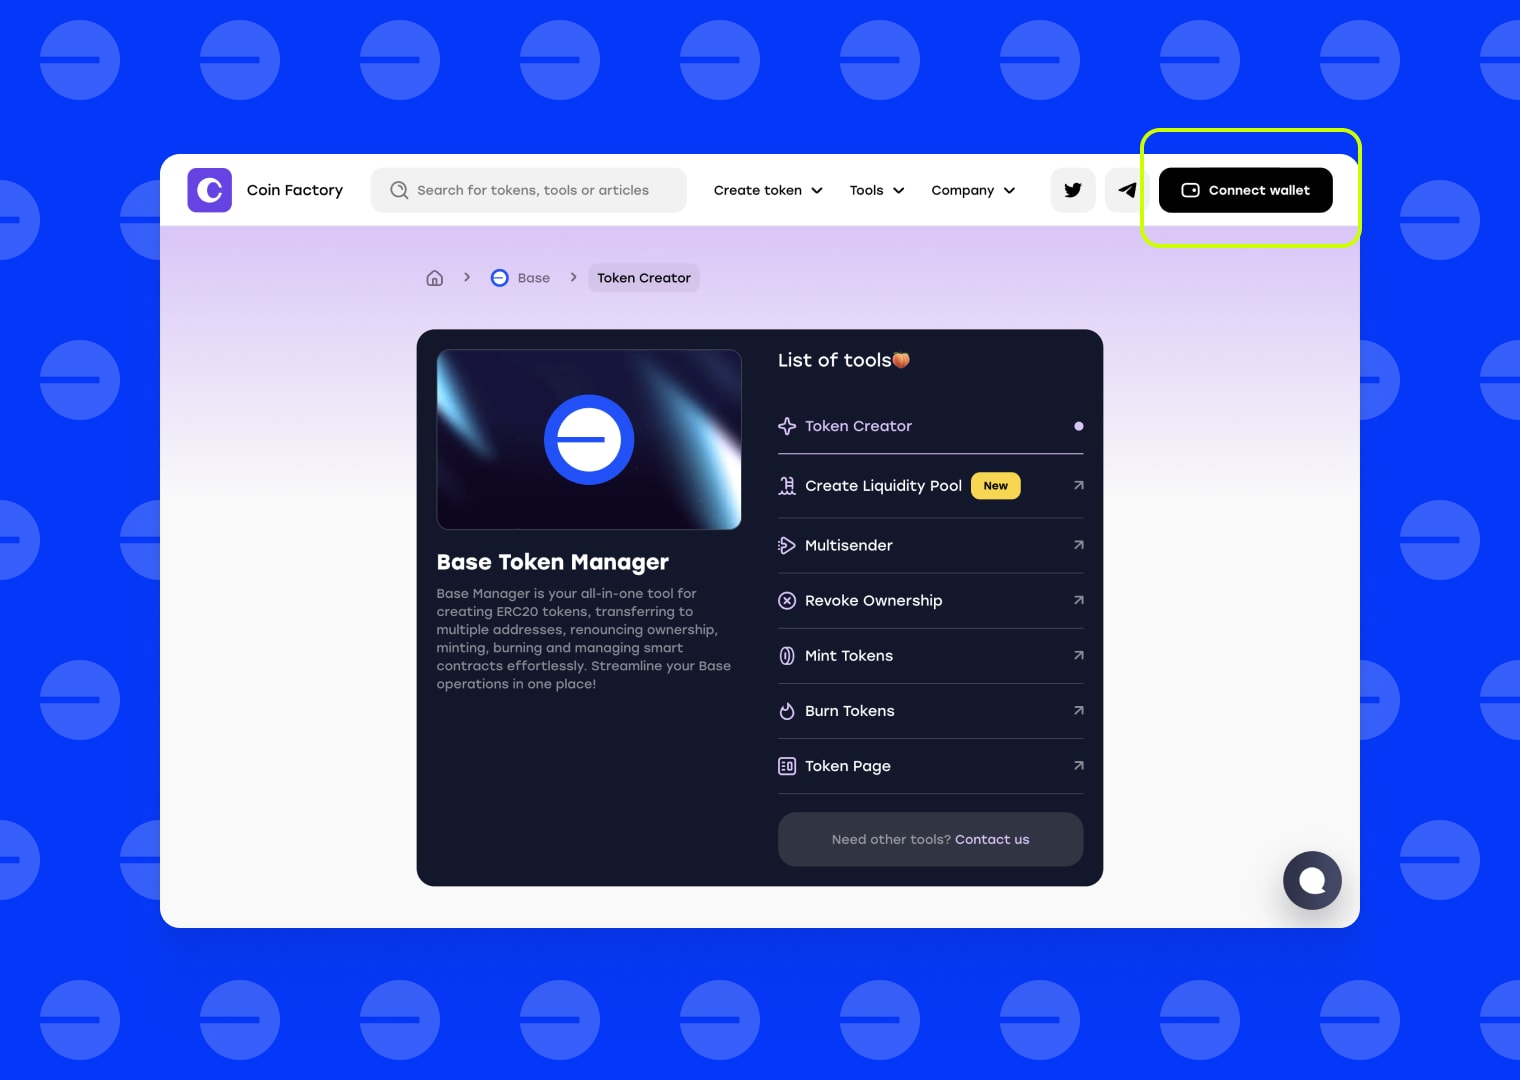
Step 2: Connect your wallet
Start by connecting your wallet to the CoinFactory Generator page. You need to connect the account that will be the owner of the smart-contract and where the initial token supply will be initiated. If you don’t have such a wallet, you can consider popular and secure options like MetaMask and Trust Wallet.
Click on EVM networks.
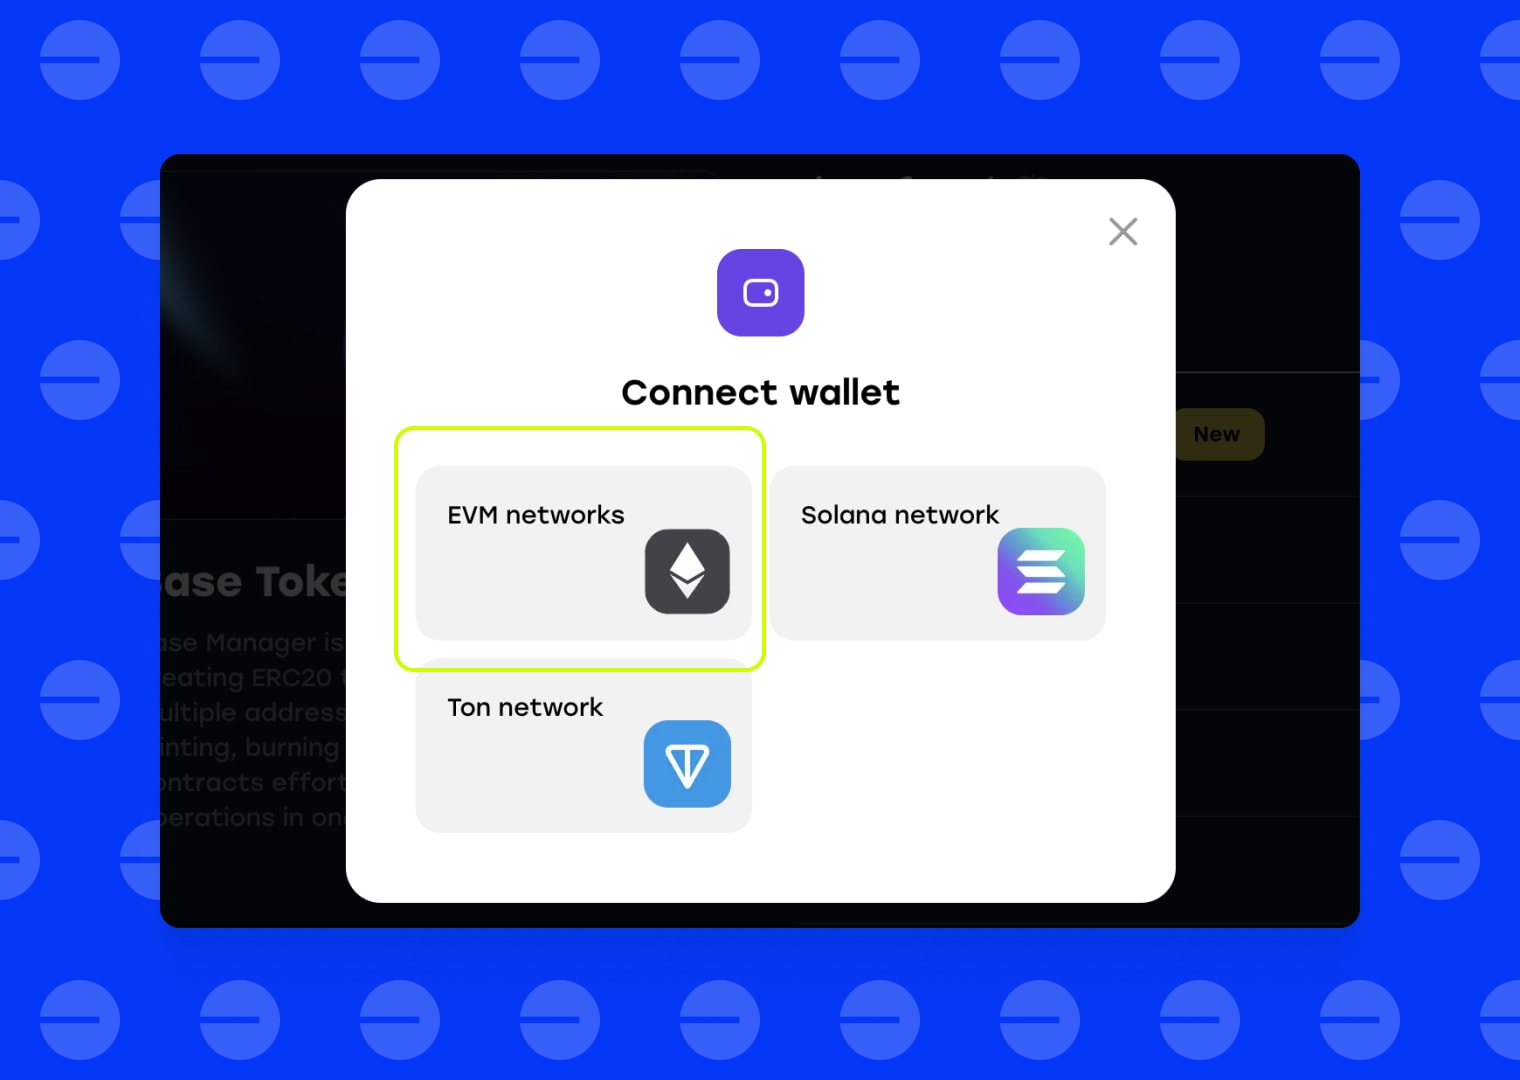
Select your wallet app.

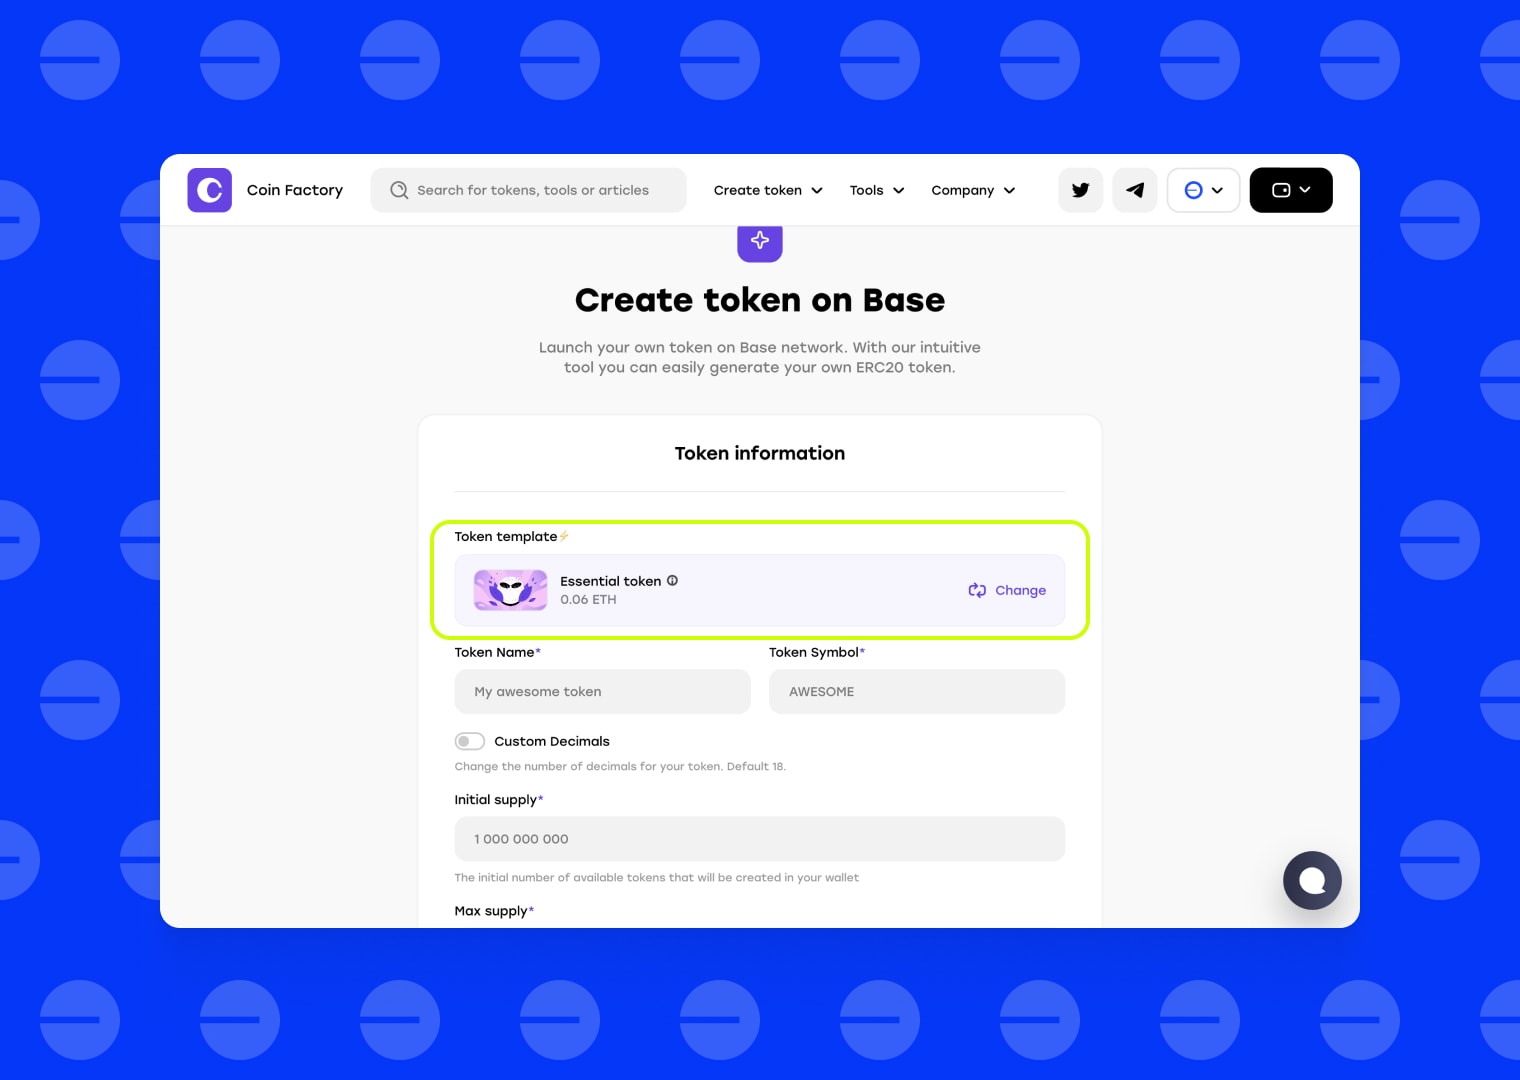
Step 3: Choose a contract template
Next, choose a contract template based on the functional requirements of your project and fill in the mandatory fields in the token creation form.
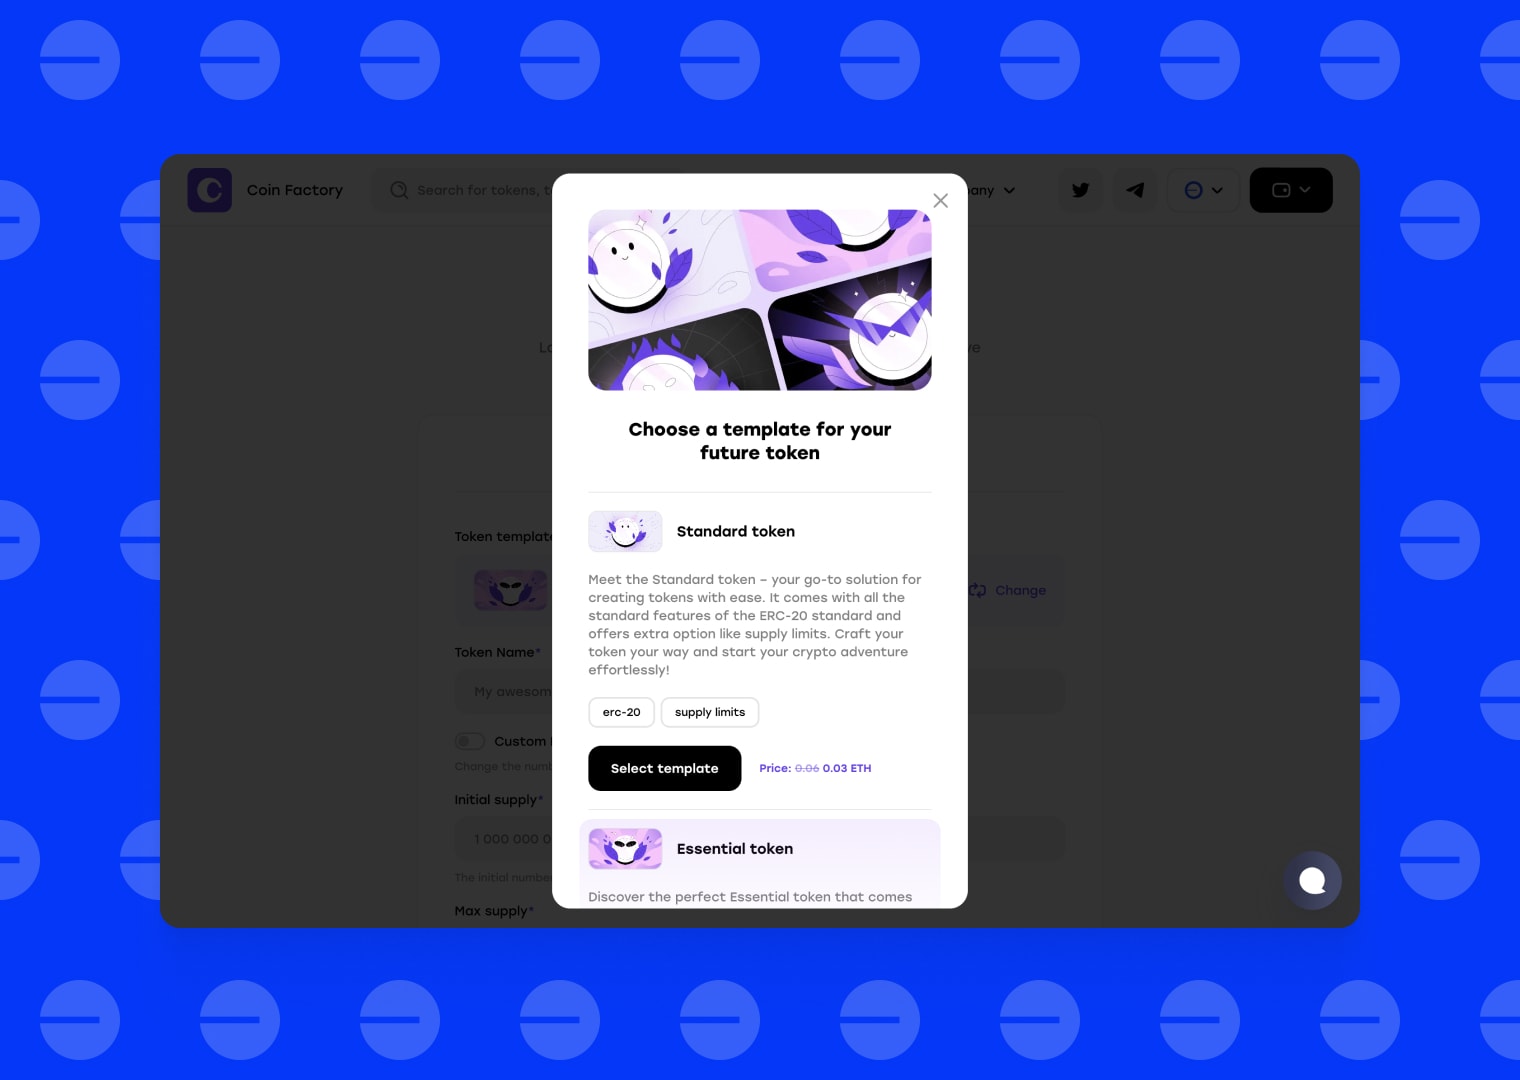
There are three most popular templates:
- Standard Token: This type of contract comes with all the standard features of the ERC-20 standard.
- Essential Token: Includes the basics from the ERC-20 standard, plus extra features! Customize your token by setting supply limits, ownership parameters, and even consider its mintable, burnable, pausable, and blacklist functionalities.
- Taxable Token: This versatile token, built on the ERC-20 standard, blends essential features with added flexibility. Tailor your token by enabling automatic tax or fee deductions from transactions.
Step 4: Enter token information and deploy it to blockchain
Next, you’ll be prompted to define the details of your ERC-20 token. This includes information such as the token name, symbol, total supply, and decimals. Take your time to carefully consider these details as they will define the characteristics of your token.
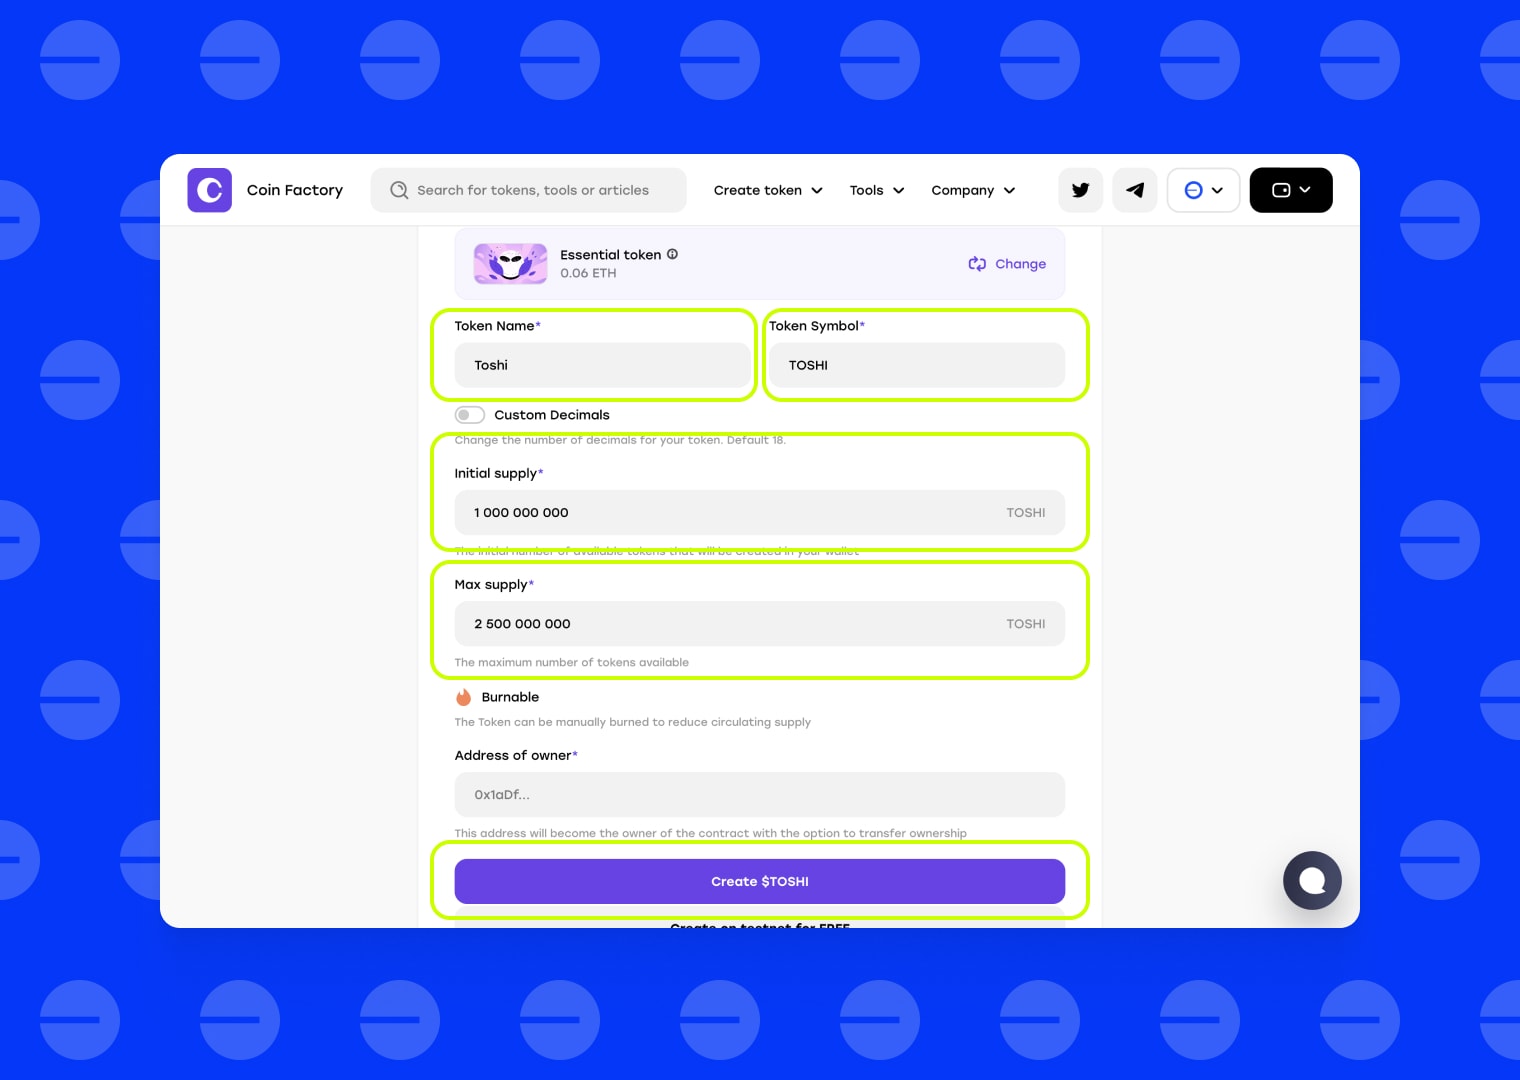
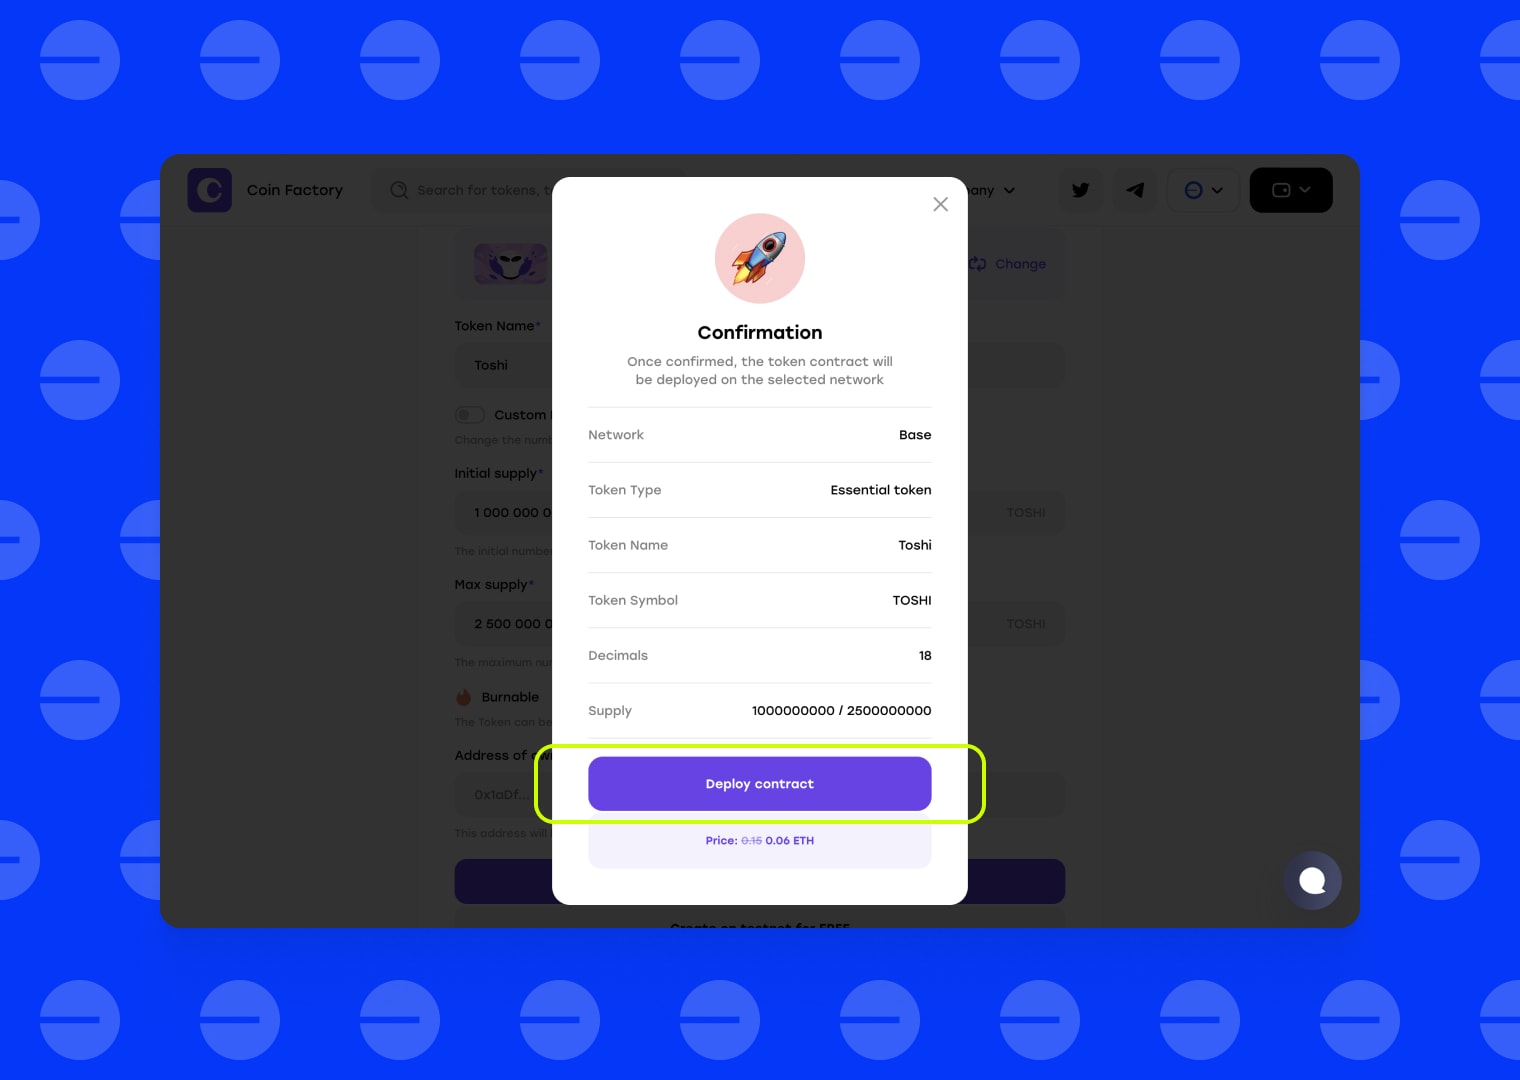
After filling out the form, click “Create token” button, and you will see a confirmation form. Please double-check the data before confirming because once the contract is deployed on the blockchain, changes become impossible. If everything is filled out correctly, click “Deploy contract” and confirm the transaction in your wallet.
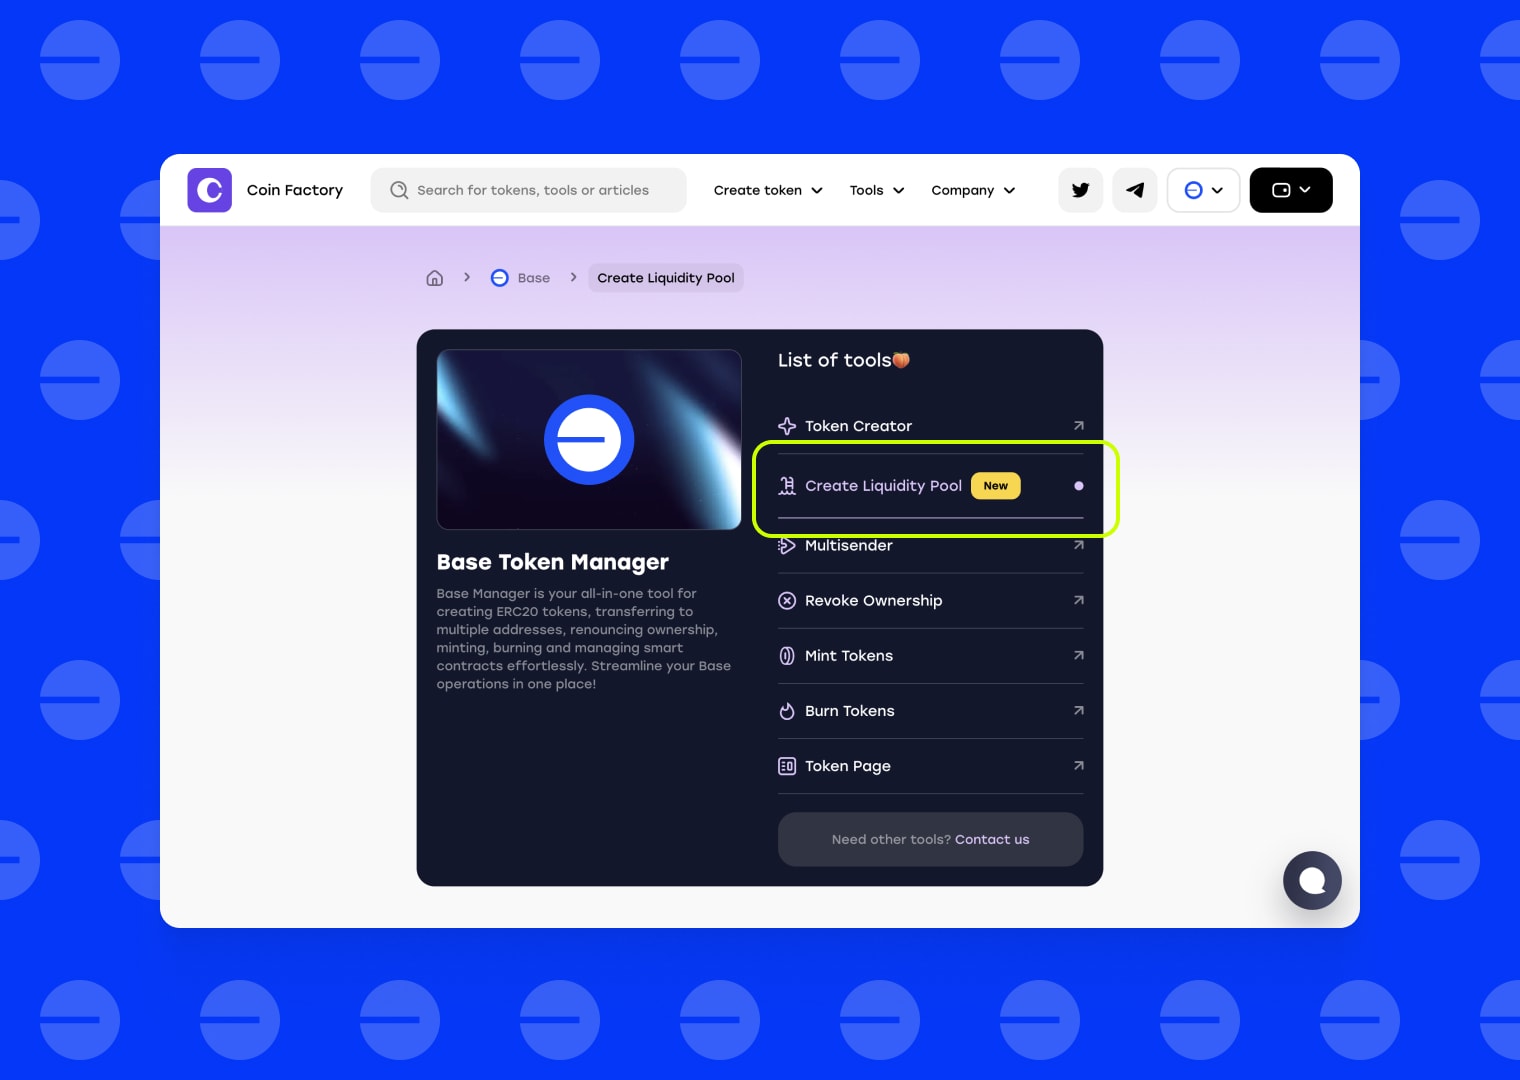
Step 5: Visit liquidity pool creation page
Step 6: Select token and amount of liquidity you want to add to exchange
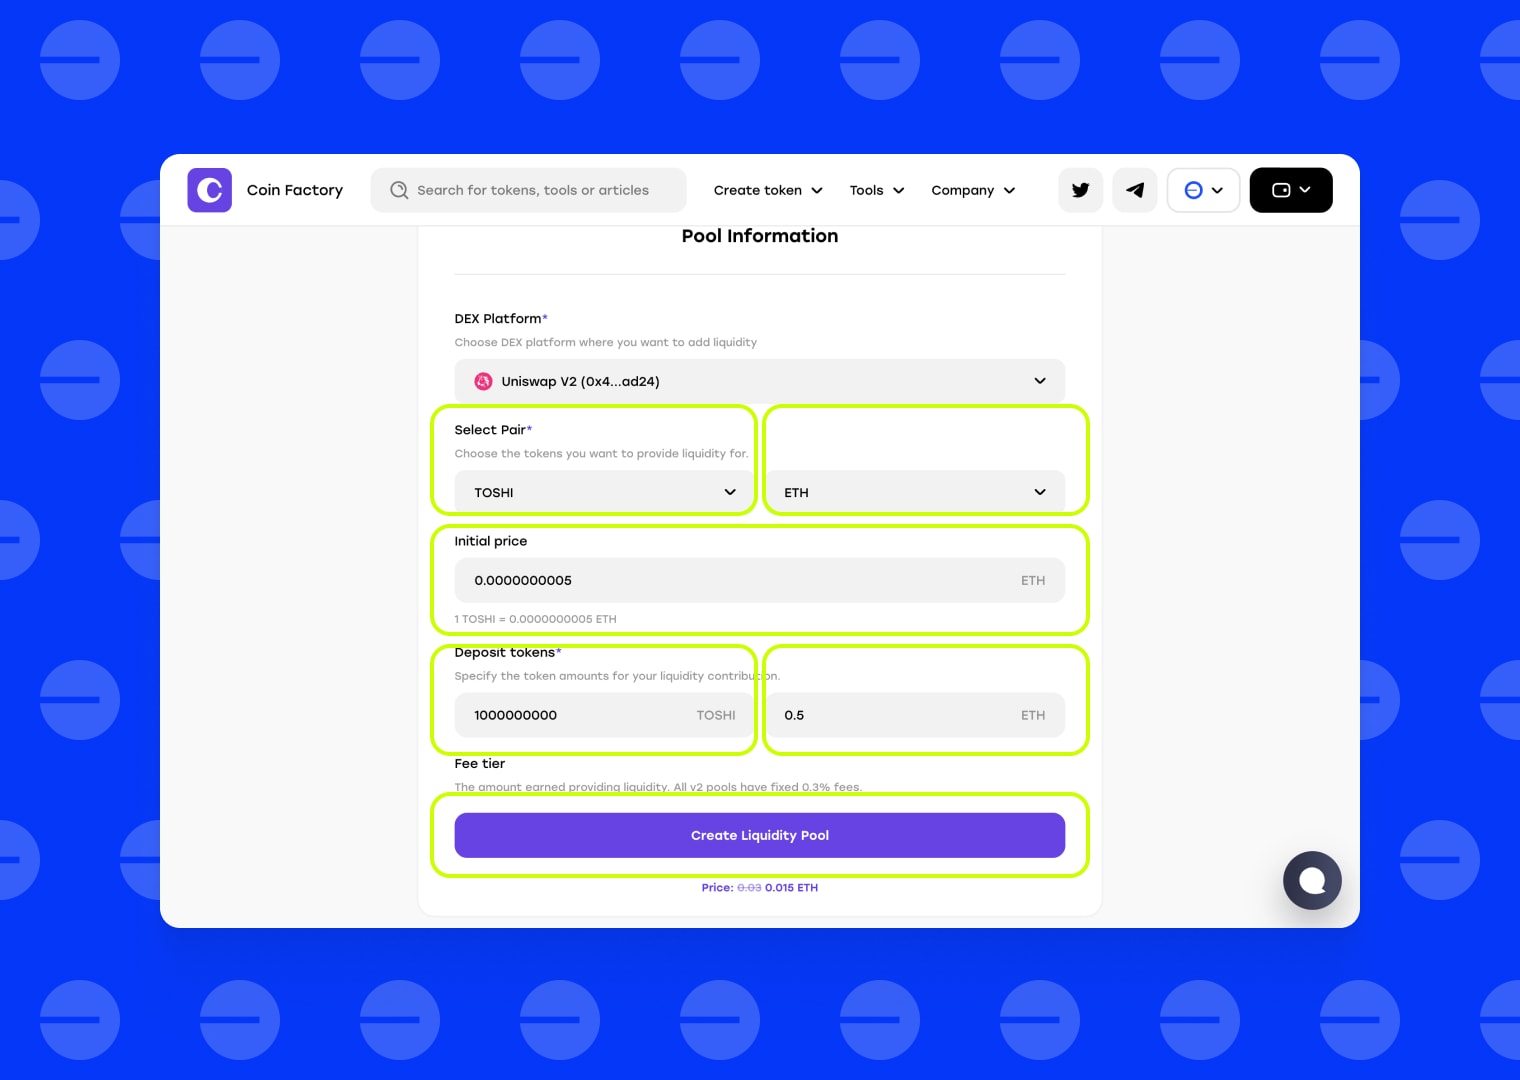
Description of form field values:
- DEX Platform: So far, only the largest DEX, Uniswap, is available.
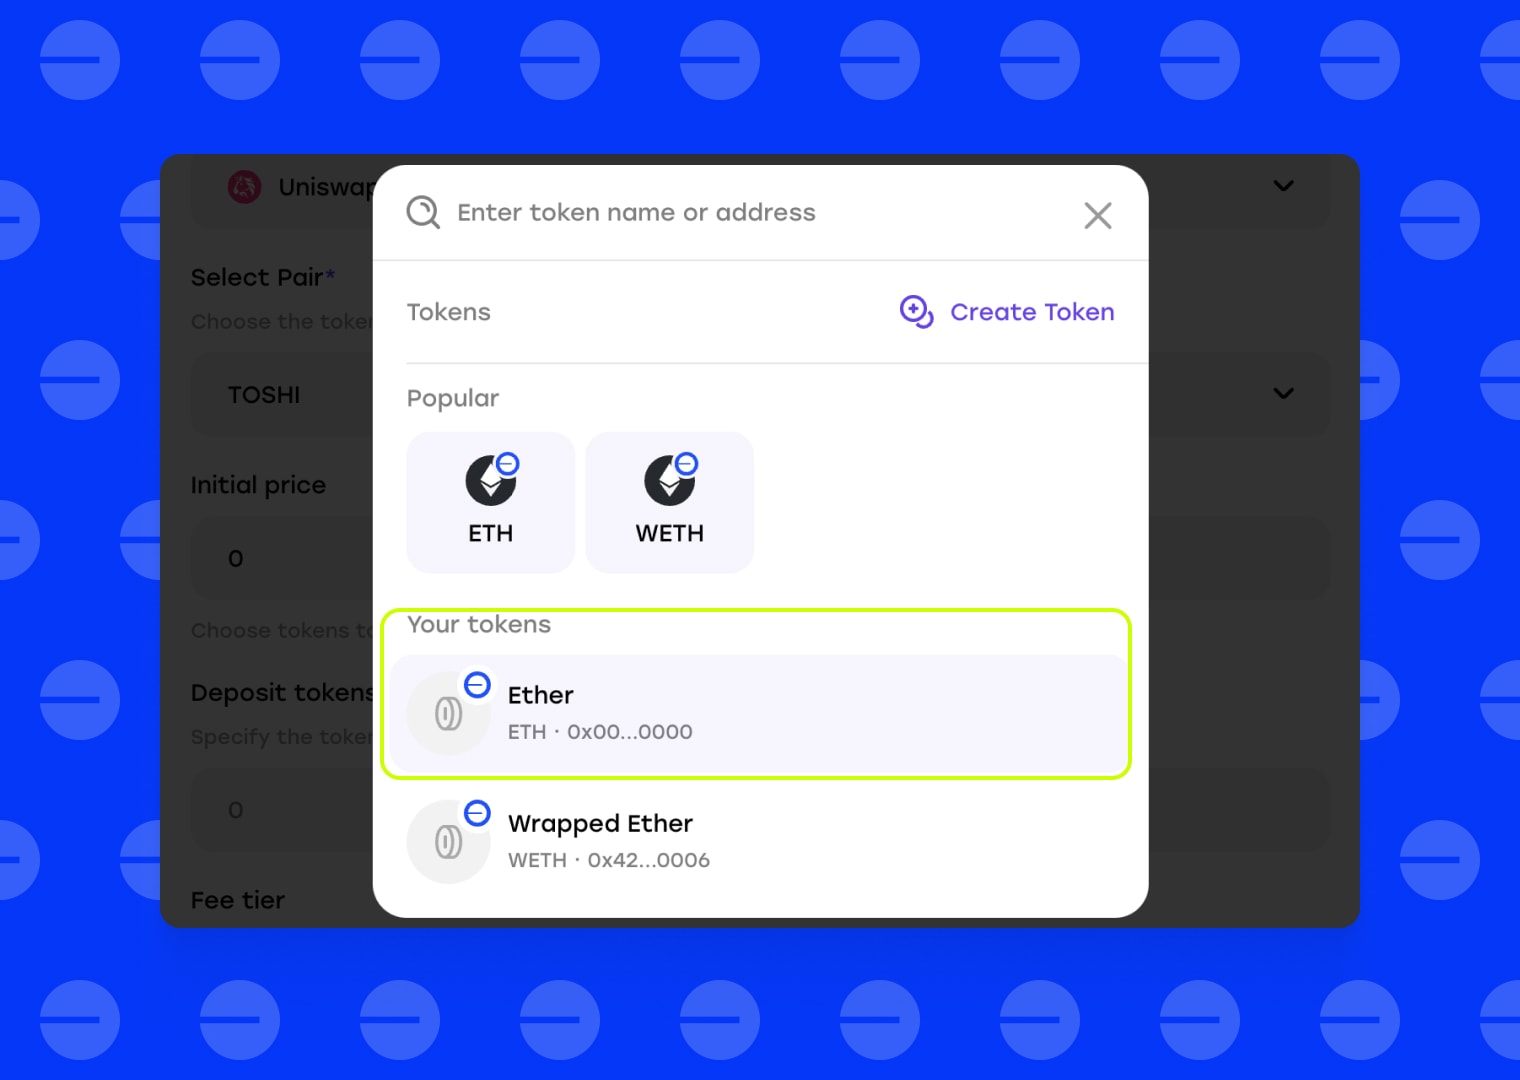
- Select Pair (Field 1): Select the token you created.
You can find your token either in the “Your Tokens” section or by searching for it using the token address.
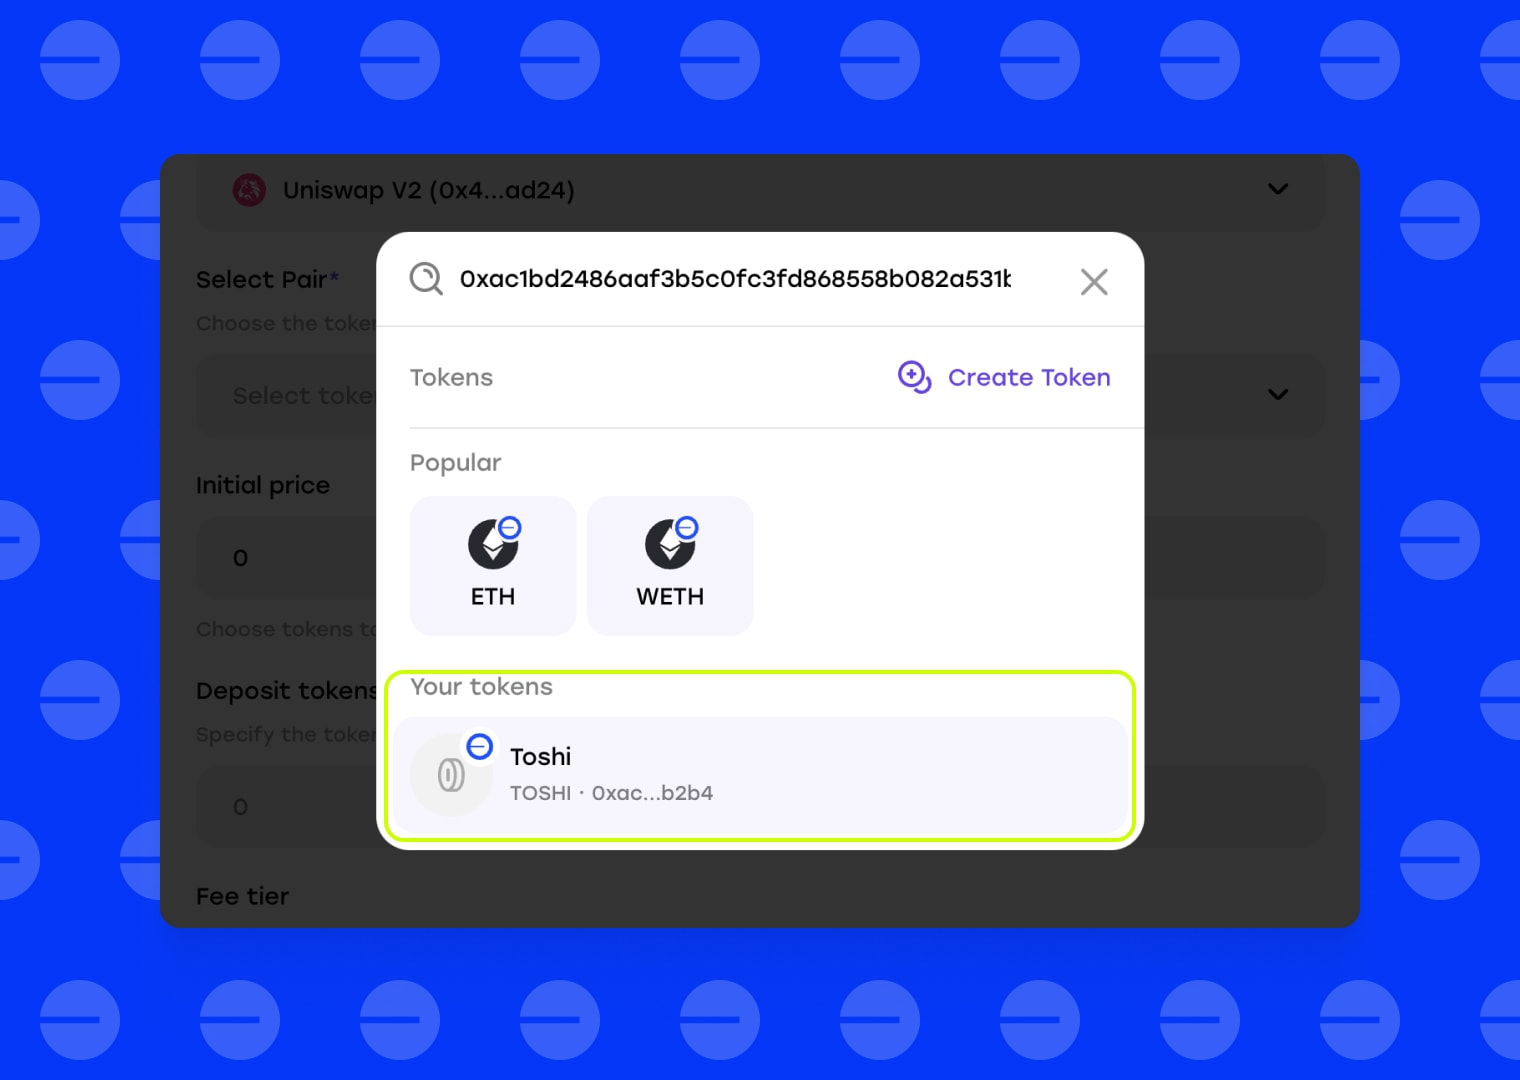
- Select Pair (Field 2): Select the token you want to exchange to, usually the native token of the network, for example ETH in the Base Network.
You can select the main swap token and the liquidity backing you will provide — for the Base network, this is usually ETH.
- Initial price: Enter your desired listing price per coin on the exchange (We recommend starting with a low price: 0.000000005 to 0.0000005).
- Deposit tokens (Field 1)(***Depends on the initial price): Specify how many of your created coins you want to send to the liquidity pool for trading on the exchange.
- Deposit tokens (Field 2)(***Depends on the initial price): Specify the amount of liquidity tokens (e.g. ETH) to send to the exchange — generally, the more coins you send, the more purchases of your token will occur.
- Fee tier: The amount earned providing liquidity. All v2 pools have fixed 0.3% fees.
Step 7: Sign 3 transactions in your wallet and your token will start trading
Important! At each step, you will need to sign a transaction in your wallet. Be attentive and don’t miss any signature requests — otherwise, the liquidity pool creation may be interrupted, and you could lose funds paid as network fees.
Done🥳
Your token is now trading on the exchange. You can already see people starting to buy it, congratulations!
Once your liquidity pool is created, you’ll be able to view the public transaction details on BaseScan.
You can track trading activity, charts, token price, and all pool information on several popular platforms — DexTools and Dexscreener.

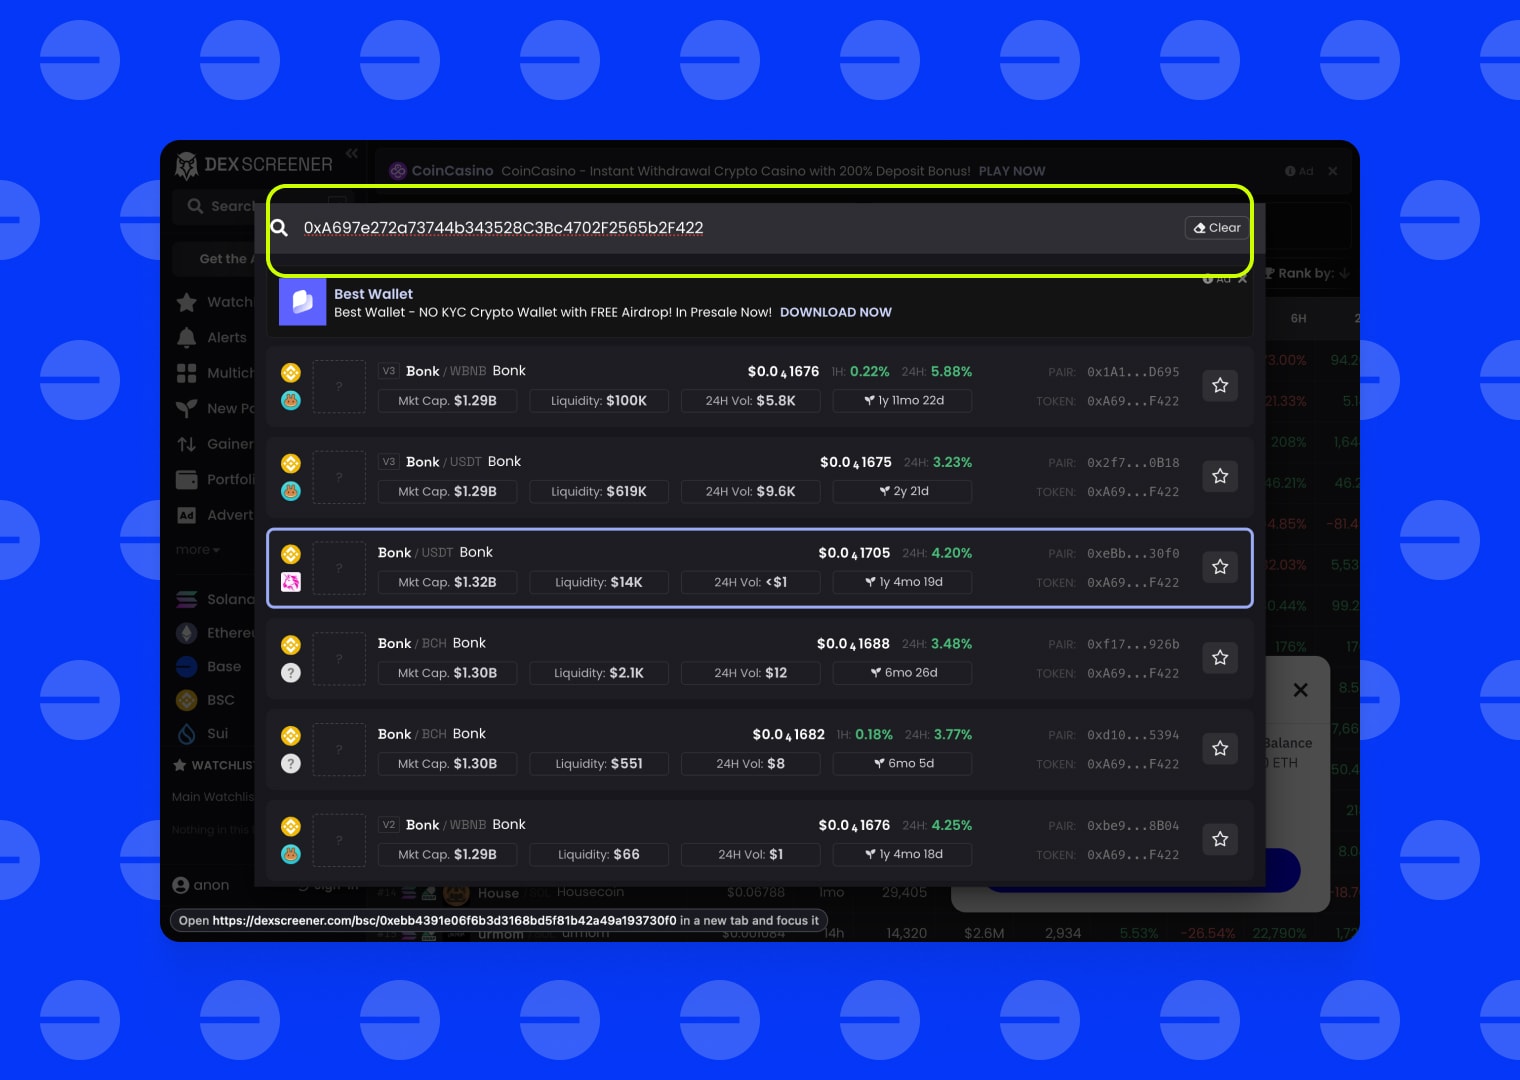
How to Find Your Token on DexTools/DexScreener?
You can find the token by entering its smart-contract address into the address bar.
Tags
Guide
Base
Meme