
How to List Your ERC-20 Token on a DEX: Create a Liquidity Pool on Ethereum in 5 Easy Steps
Learn how to list your ERC-20 token on a DEX by creating a liquidity pool on Ethereum. A simple, no-code guide using CoinFactory to launch your token fast.
Why Create a Liquidity Pool for Your ERC-20 Token on Ethereum?
Creating a liquidity pool is a crucial step for any project launching an ERC-20 token on Ethereum. Here’s why it matters:
- Enable Trading on DEXs: Without a liquidity pool, your token cannot be bought or sold on decentralized exchanges like Uniswap. The pool provides the necessary trading pair (e.g., ETH/TOKEN) that allows users to swap assets instantly.
- Increase Token Visibility and Accessibility: Listing your token in a liquidity pool makes it publicly available and searchable across major DeFi platforms, increasing exposure and adoption.
- Kickstart Price Discovery: A liquidity pool helps establish a market-driven price for your token based on supply and demand dynamics, which is essential for investor trust and transparency.
- Attract Community Participation: Users can provide liquidity and earn a share of trading fees, helping build a community around your token and strengthen its ecosystem.
- Decentralized and Permissionless Listing: Unlike centralized exchanges, DEXs don’t require approval. You can list your token and create a trading market without third-party involvement.
Step-by-step instructions
Step 1: Go to liquidity pool creation page on Ethereum
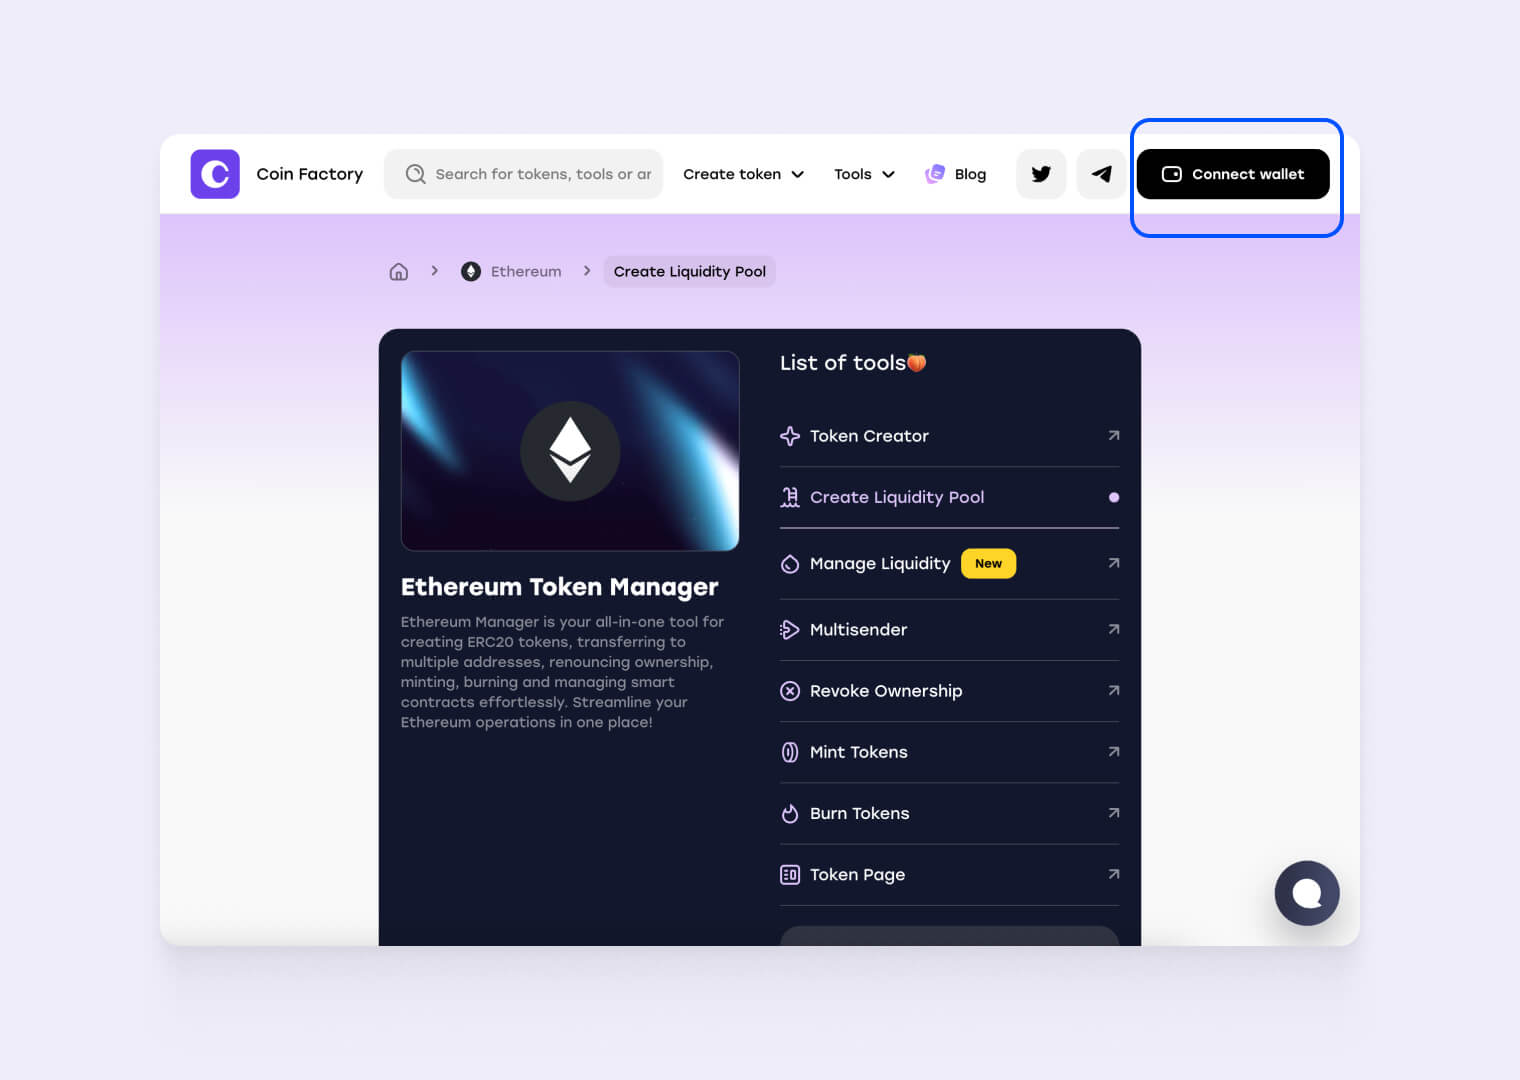
Step 2: Connect wallet from which you created token

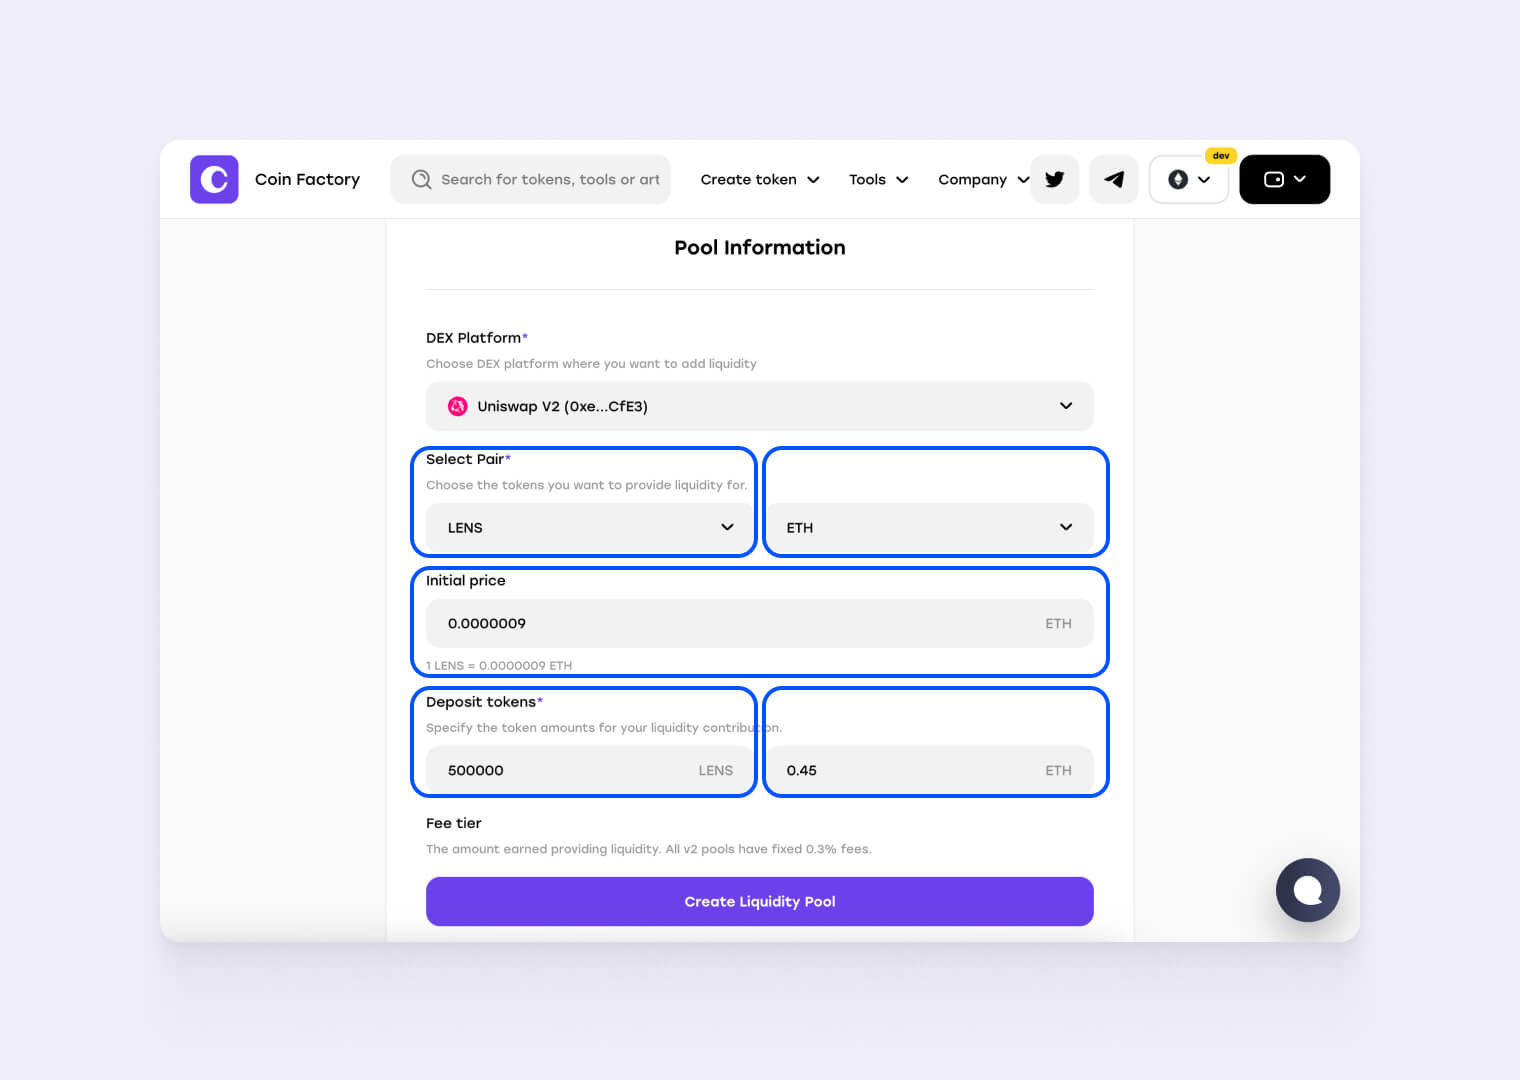
Step 3: Fill in your liquidity pool details
Important! Before creating a liquidity pool, you must already have your own token that you want to list on the exchange. Without it, you won’t be able to proceed. If you haven’t created your token yet, you can do so using our guide.
Description of form field values:
- DEX Platform: So far, only the largest DEX, Uniswap, is available.
- Select Pair (Field 1): Select the token you created.
- Select Pair (Field 2): Select the token you want to exchange to, usually the native token of the network, for example ETH in the Ethereum Network.
- Initial price: Enter your desired listing price per coin on the exchange (We recommend starting with a low price: 0.000000005 to 0.0000005).
- Deposit tokens (Field 1)(***Depends on the initial price): Specify how many of your created coins you want to send to the liquidity pool for trading on the exchange.
- Deposit tokens (Field 2)(***Depends on the initial price): Specify the amount of liquidity tokens (e.g. ETH) to send to the exchange — generally, the more coins you send, the more purchases of your token will occur.
- Fee tier: The amount earned providing liquidity. All v2 pools have fixed 0.3% fees.
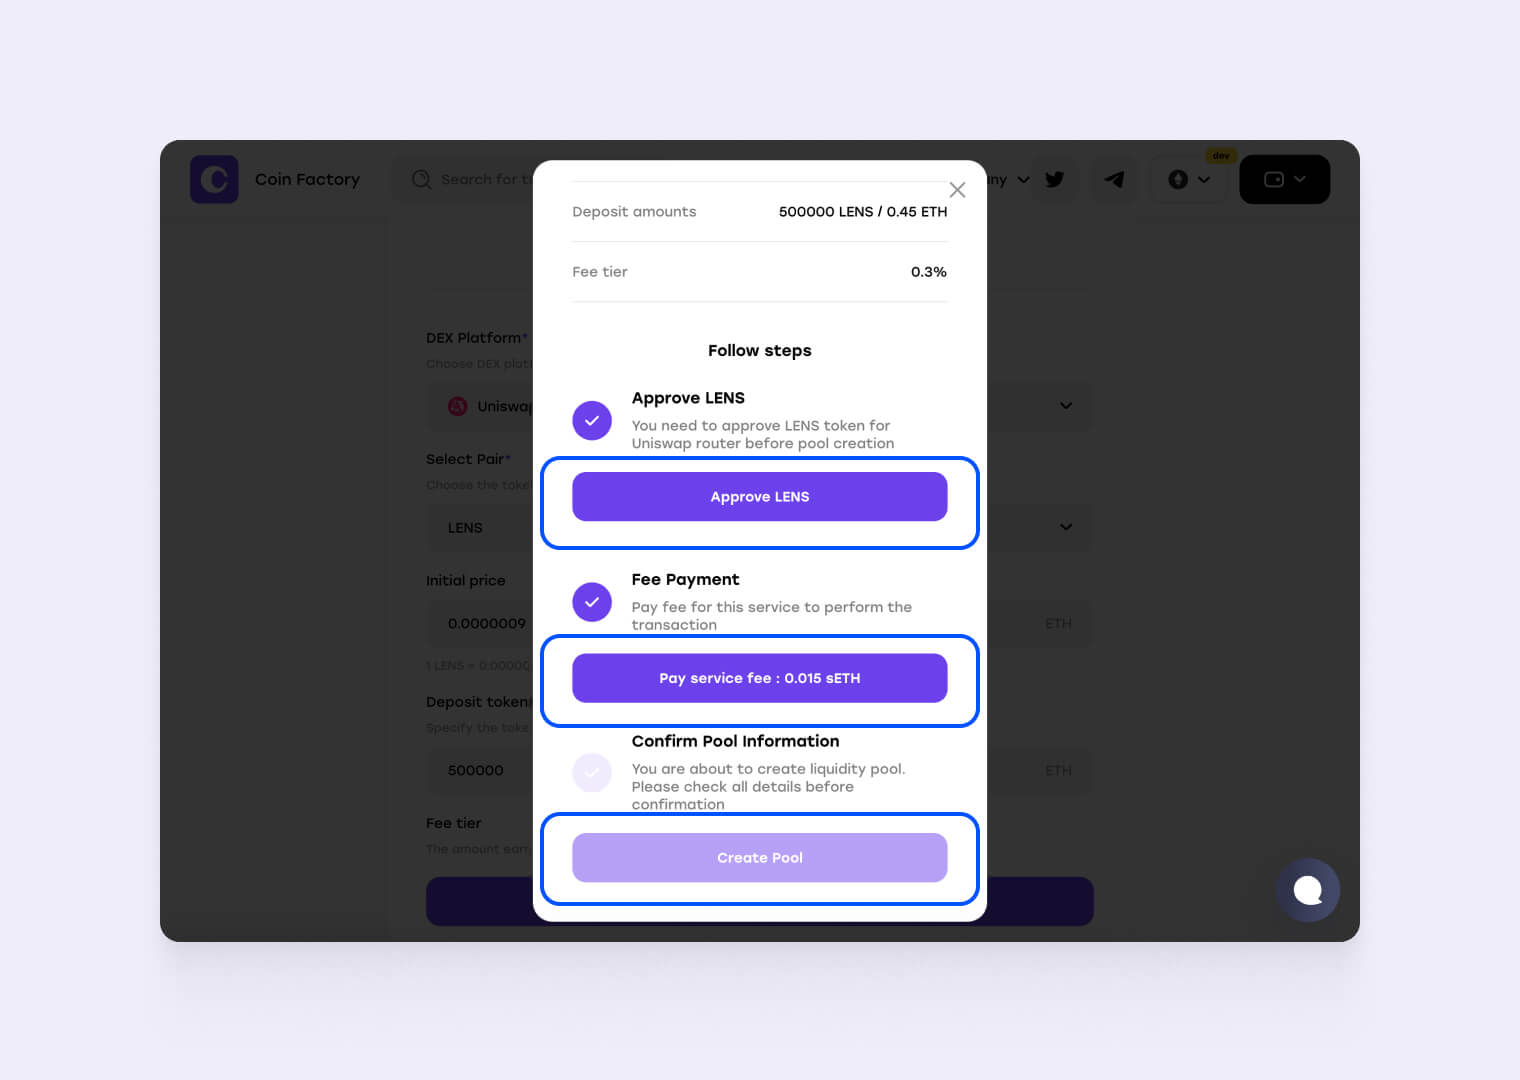
Step 4: Follow the steps to register a liquidity pool on the exchange
Important! At each step, you will need to sign a transaction in your wallet. Be attentive and don’t miss any signature requests — otherwise, the liquidity pool creation may be interrupted, and you could lose funds paid as network fees.
Done🥳
Your token is now trading on the exchange. You can already see people starting to buy it, congratulations!
Once your liquidity pool is created, you’ll be able to view the public transaction details on Etherscan.
You can track trading activity, charts, token price, and all pool information on several popular platforms — DexTools and Dexscreener.
Conclusion
A liquidity pool is essential to make your ERC-20 token tradable and discoverable on Ethereum-based DEXs. With CoinFactory, you can easily create and launch your pool in just a few clicks — no coding required. It’s the fastest way to bring your token to the market and start building liquidity.

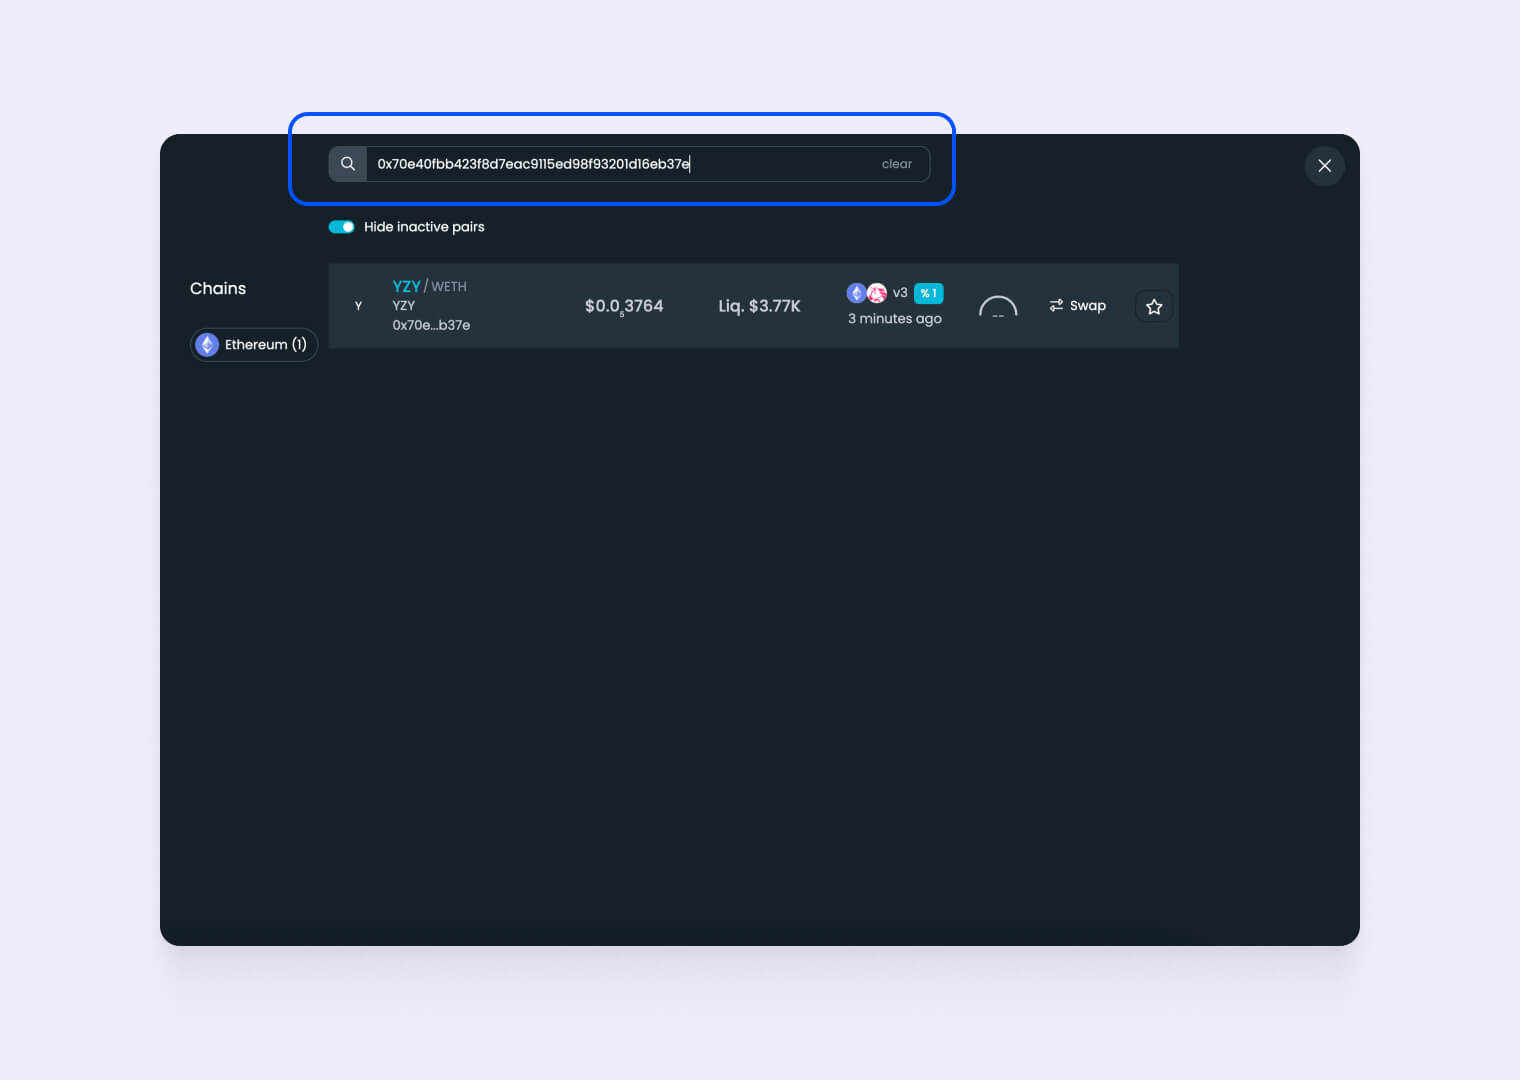
How to Find Your Token on DexTools/DexScreener?
You can find the token by entering its smart-contract address into the address bar.
Example:
Tags
Guide
Ethereum