
How to Create a Token on Monad in 4 steps (without coding)
Learn how to create a token on the Monad network in just a few simple steps — no coding required. Follow this beginner-friendly guide to generate, deploy, and launch your own Monad token quickly and securely.
Why You Should Create a Token on Monad
Monad is quickly becoming one of the most attractive ecosystems for launching new tokens thanks to its high performance and modern architecture. Built for speed, scalability, and low fees, Monad gives creators everything they need to launch tokens without technical complexity.
Key advantages:
- ⚡ High Speed & Instant Finality: Transactions confirm almost instantly — perfect for trading and fast community growth.
- 💰 Very Low Fees: Creating, sending, and trading your token on Monad costs almost nothing.
- 🧩 Full EVM Compatibility: Works with familiar EVM tools, wallets, and DEXs — no new stack to learn.
- 📈 Early-Mover Advantage: The ecosystem is growing fast, so launching now gives your token more visibility.
- 🔒 Strong Security: Modern architecture keeps your token and holders safe.
- 🚀 Ideal for Web3 Startups & Meme Projects Alike: Whether you’re launching a utility token, community coin, or meme token, Monad’s speed + low fees + scalability make it the perfect environment for experimentation and growth.
Step-by-Step Instructions
Step 1: Visit CoinFactory Monad Token Generator
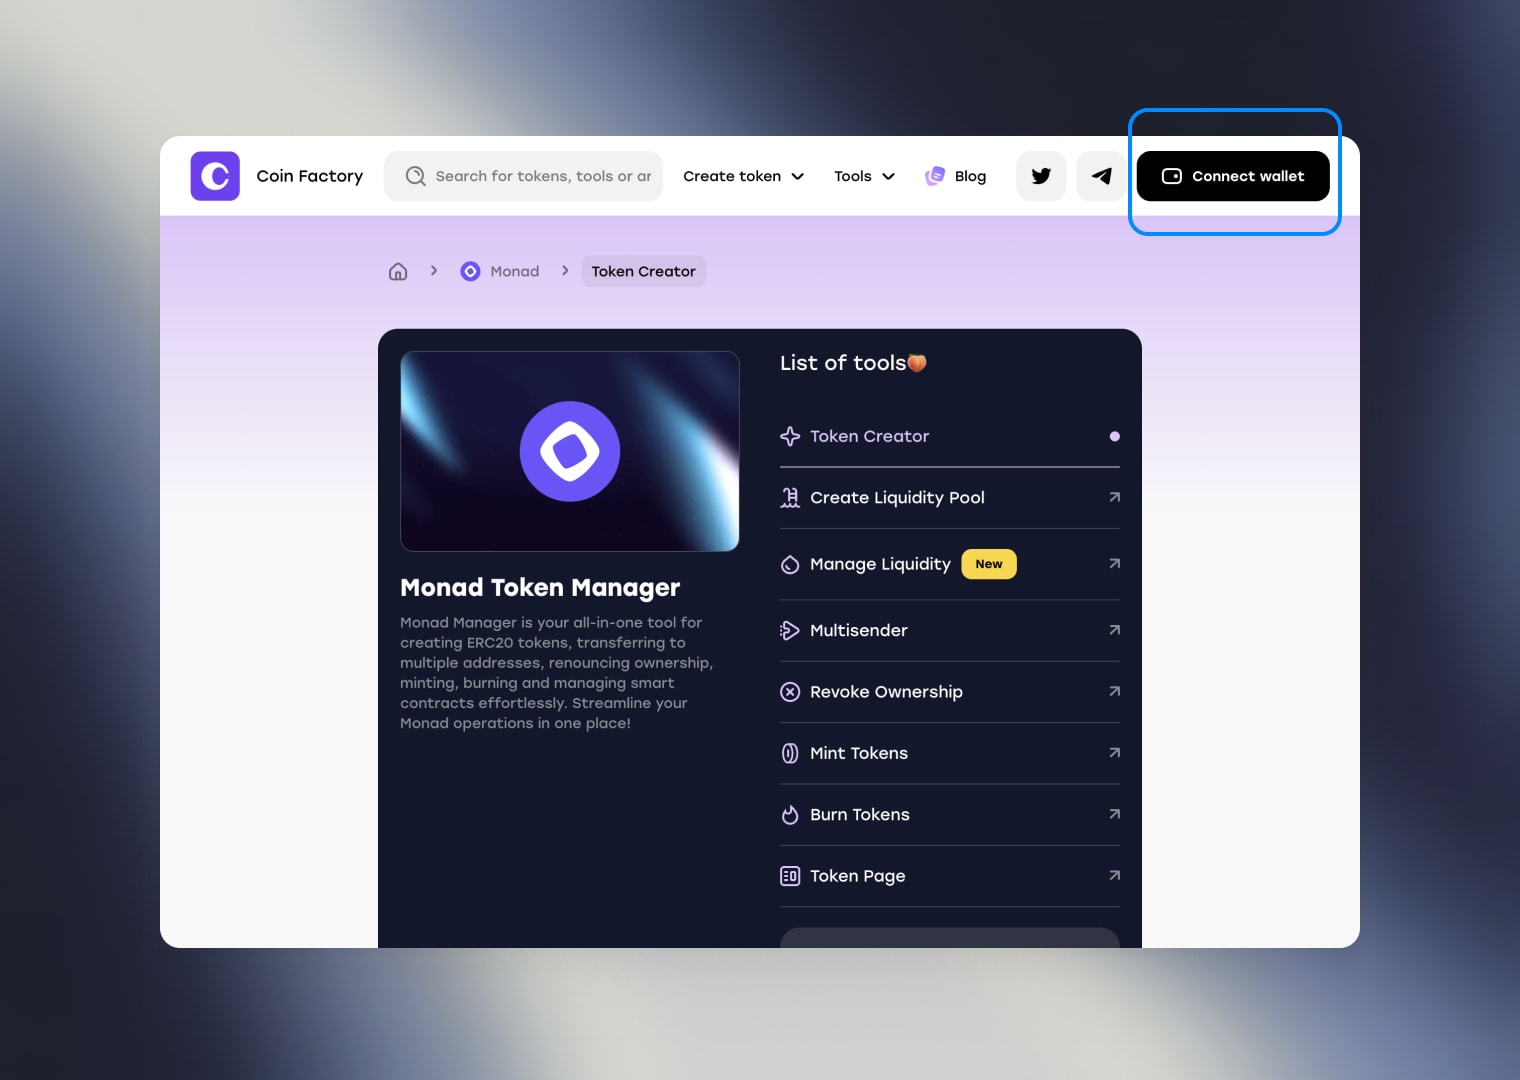
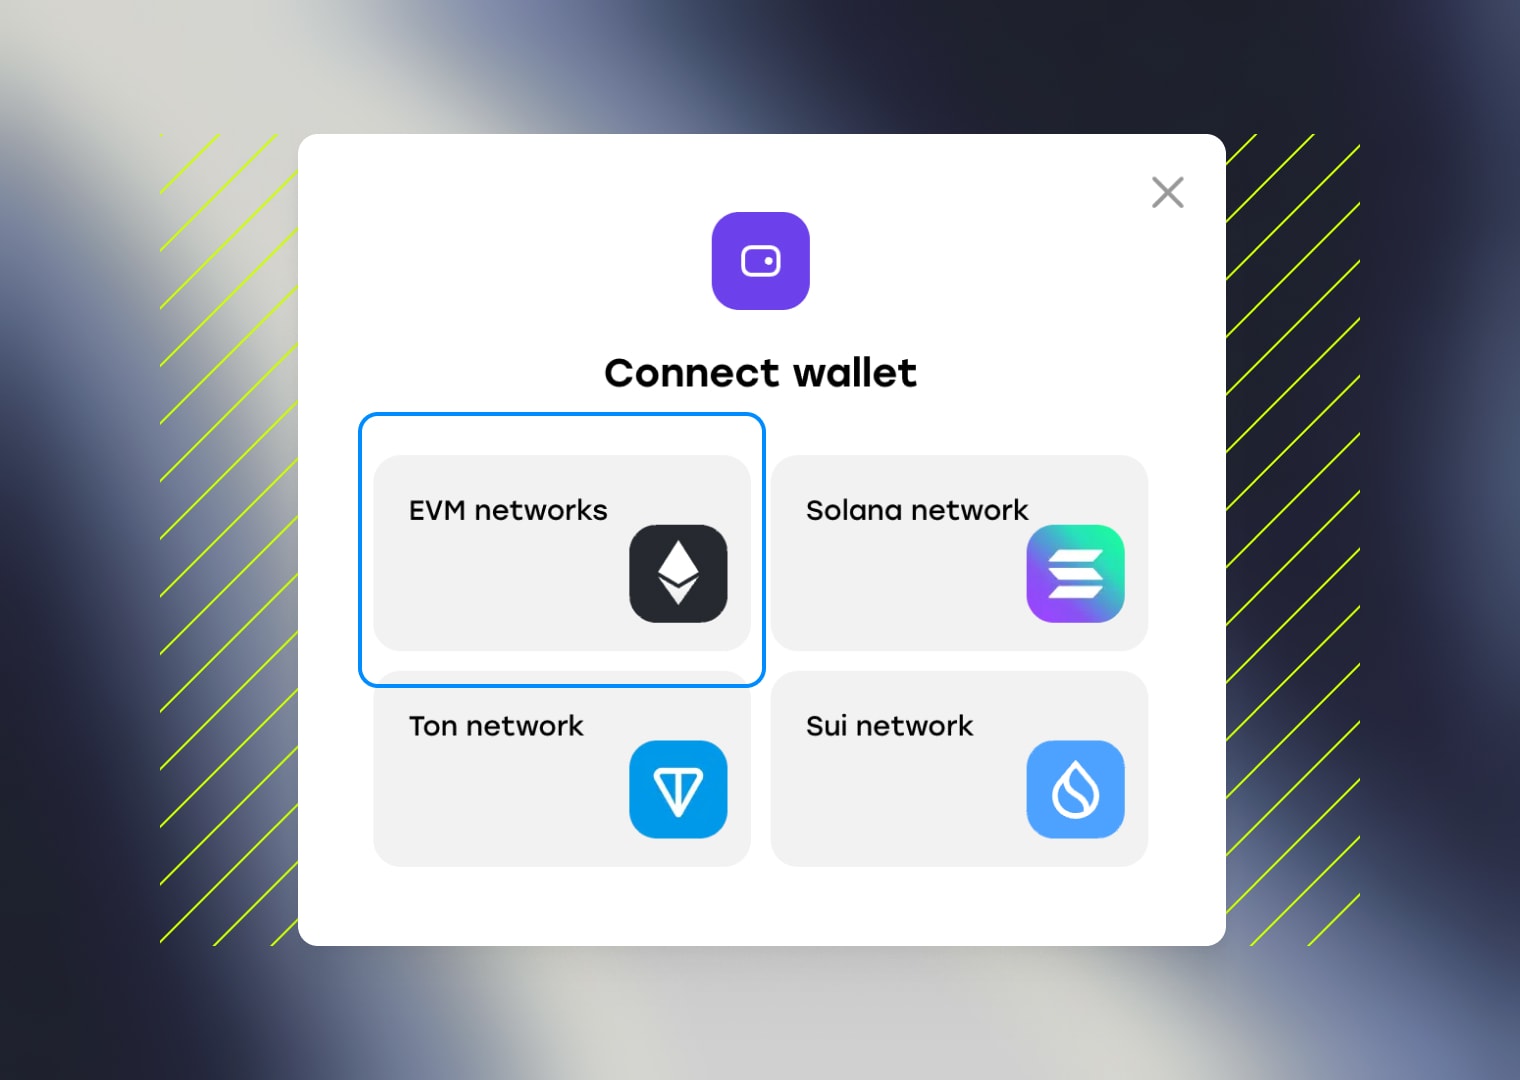
Step 2: Connect your wallet
Start by connecting your wallet to the CoinFactory Monad Generator page. Make sure you use the account that will become the owner of the smart contract and receive the initial token supply.
If you don’t have a Monad-compatible wallet yet, you can use popular options like MetaMask or Trust Wallet — both support EVM-based networks like Monad.
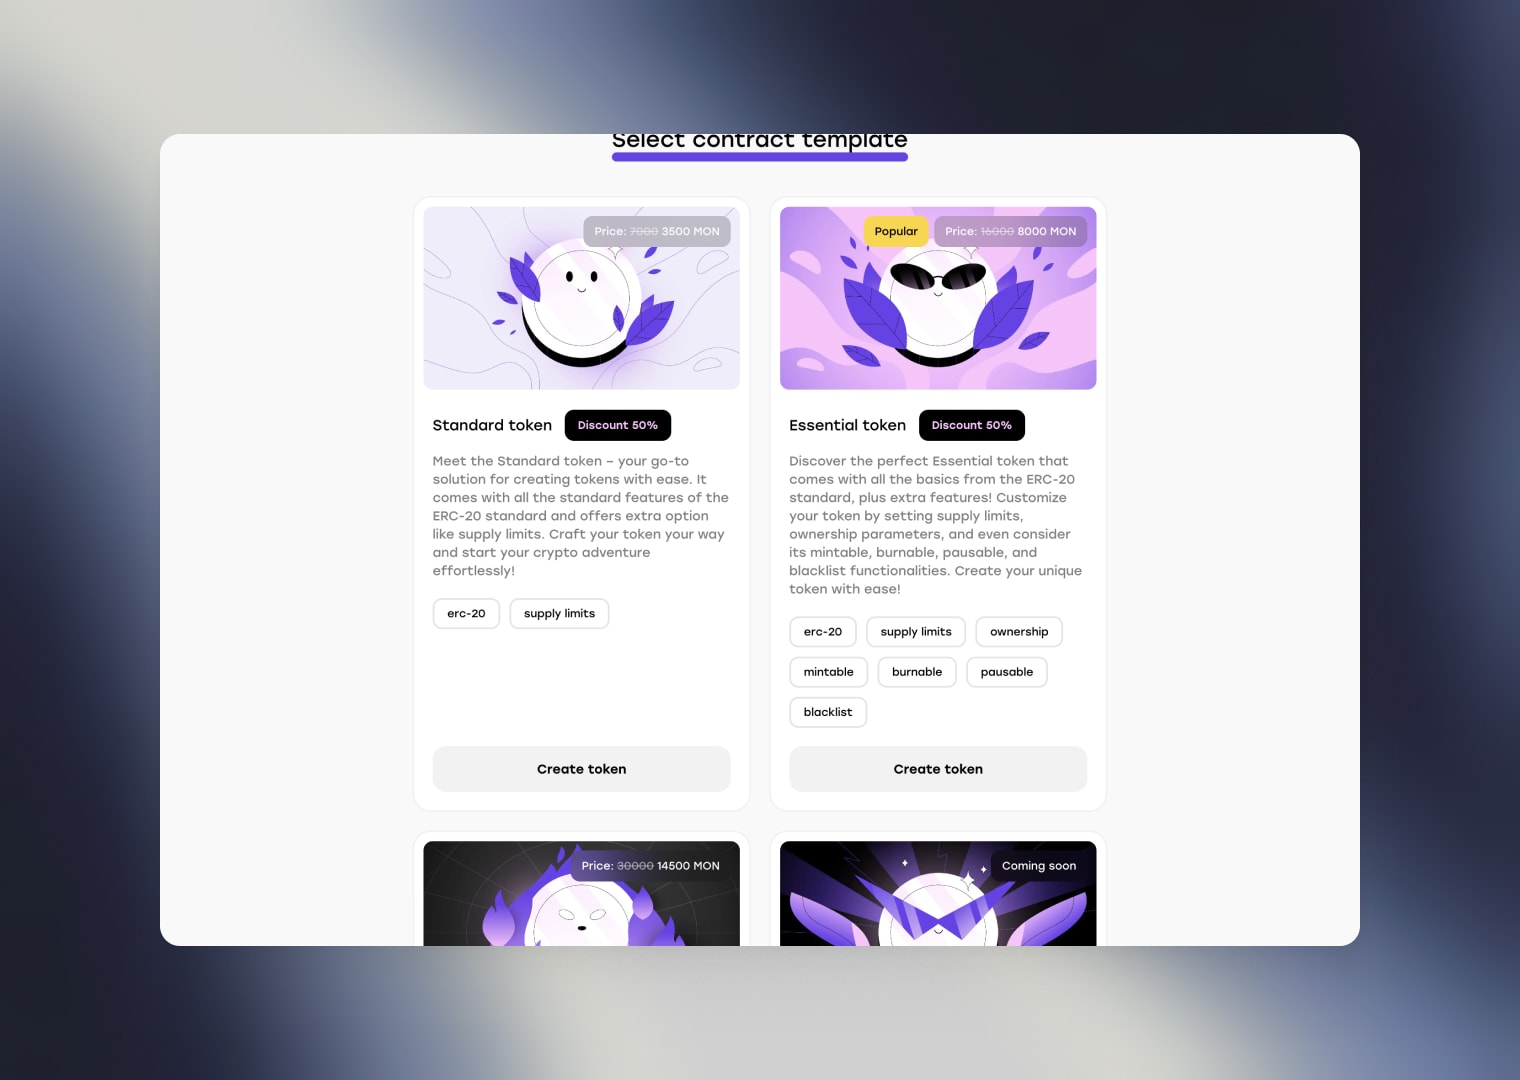
Step 3: Choose a contract template
Next, select a contract template that fits your project’s needs and complete the required fields in the token creation form.
Here are the three most popular template options:
- Standard Token: A simple, clean implementation of the ERC-20 standard — ideal for basic tokens without extra functionality.
- Essential Token: Includes all core ERC-20 features plus enhanced options. You can set supply limits, ownership rules, and enable mintable, burnable, pausable, or blacklist functions.
- Taxable Token: An ERC-20–based token with built-in flexibility, allowing you to enable automatic tax or fee deductions from every transaction.
Step 4: Define token details
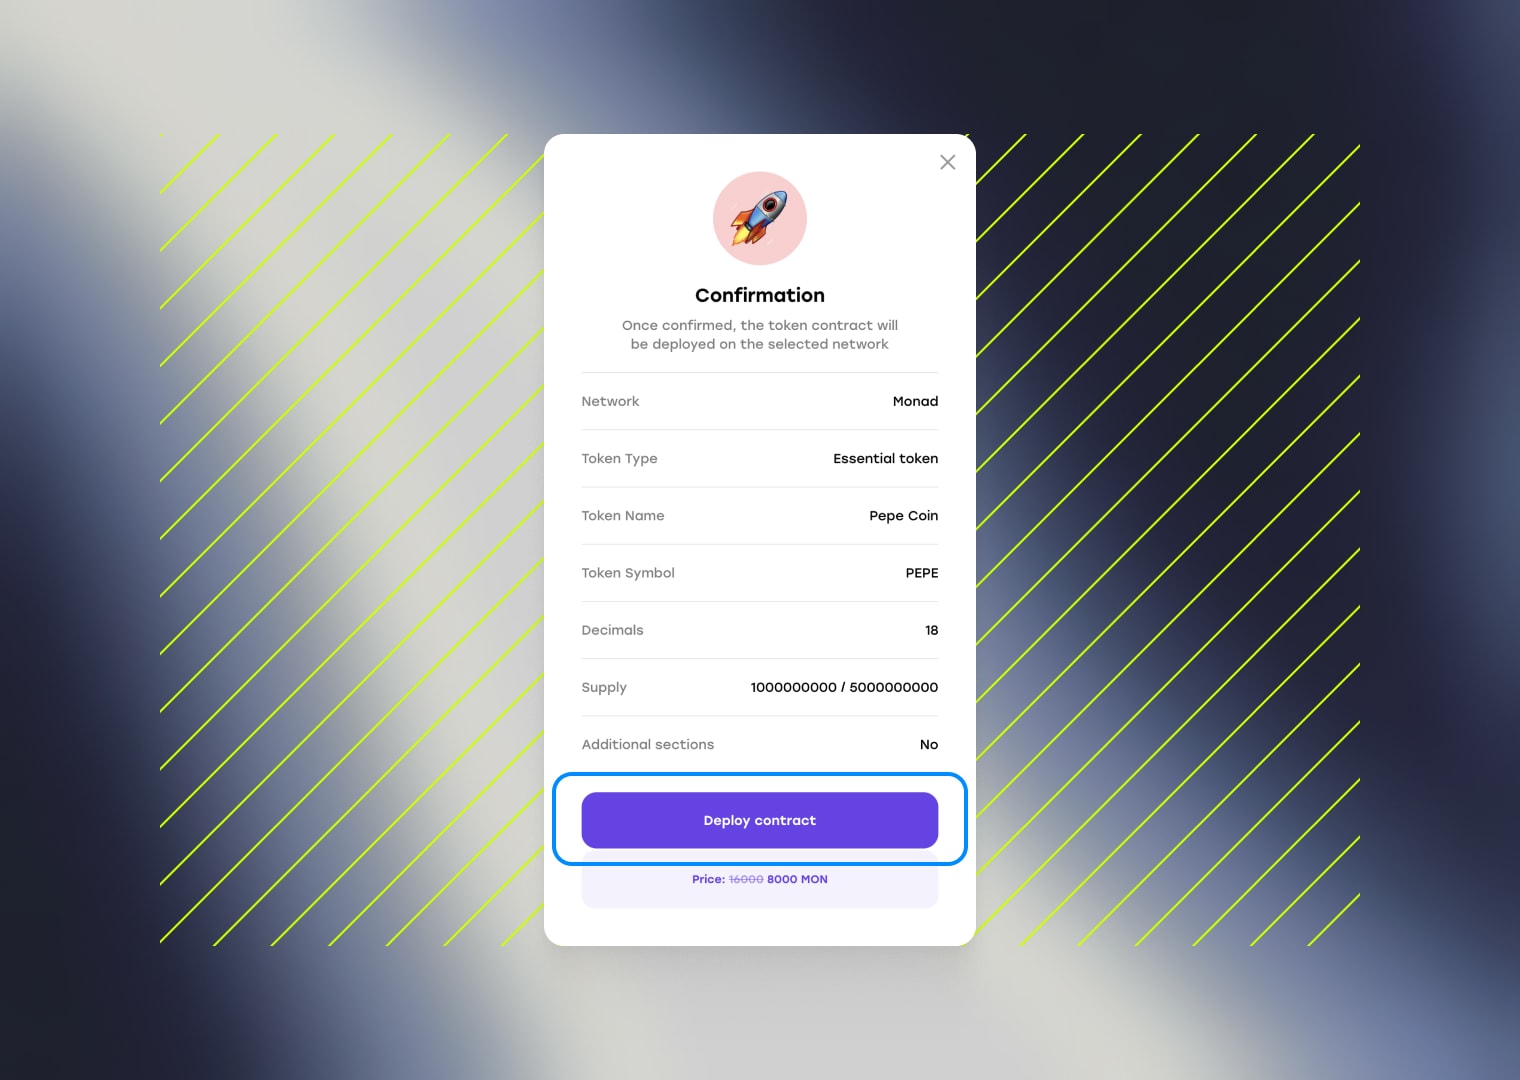
Next, you’ll be prompted to define the details of your Monad token. This includes the token name, symbol, total supply, and decimals. Take your time with these settings — they will define how your token looks and behaves across the Monad network.

After filling out the form, click the “Create token” button. You will see a confirmation screen with all your token parameters. Carefully review all the details before confirming — once the contract is deployed to the Monad blockchain, it cannot be changed.
If everything looks correct, click “Deploy contract” and confirm the transaction in your wallet. Your Monad token will be created and ready to use.
🎉 Congratulations! Your Monad token has been successfully created. You can visit MonadVision to confirm that the token minting to the contract owner’s address was completed successfully.
Conclusion
Creating a token on Monad is fast, simple, and accessible — even without coding skills. With CoinFactory, you can deploy a fully functional token in just a few steps, taking advantage of Monad’s speed, low fees, and EVM compatibility. Whether you’re launching a community coin, a meme project, or a utility token for your startup, Monad provides the ideal environment for growth.
Tags
Guide
Monad
Token
Erc20