


How to Create a Liquidity Pool for TRC-20 Token on Tron Network
Learn how to create a liquidity pool for your TRC-20 token on the TRON Network using SunSwap V3. Set the token price and add liquidity in minutes.
 CoinFactory
Why Create a Liquidity Pool for Your TRC-20 Token?
Creating a TRC-20 token is only the first step. If you want users to be able to buy, sell, and trade your token on a decentralized exchange (DEX), you need to create a liquidity pool.
A liquidity pool pairs your TRC-20 token with another asset, such as TRX or USDT, and provides the liquidity required for decentralized trading. Without sufficient liquidity, users may be unable to trade your token efficiently or may experience high price impact.
By creating a liquidity pool for your TRC-20 token, you can:
- Enable token trading on decentralized exchanges.
- Establish an initial market price for your token.
- Provide liquidity for buyers and sellers.
- Make your token accessible to a wider TRON ecosystem.
- Build the foundation for further trading activity and token growth.
With CoinFactory, you can create a liquidity pool for your TRC-20 token directly on the TRON Network without writing smart contracts or interacting with complex DEX interfaces.
Step-by-Step Instructions
Creating a liquidity pool with CoinFactory takes just a few steps. You don't need to interact with smart contracts manually — simply connect your wallet, configure the pool, and confirm the transaction.
Step 1: Open the TRON Liquidity Pool Creator
Go to the CoinFactory Liquidity Pool Creator for the TRON Network. This tool allows you to create a SunSwap V3 liquidity pool for your TRC-20 token directly through CoinFactory.
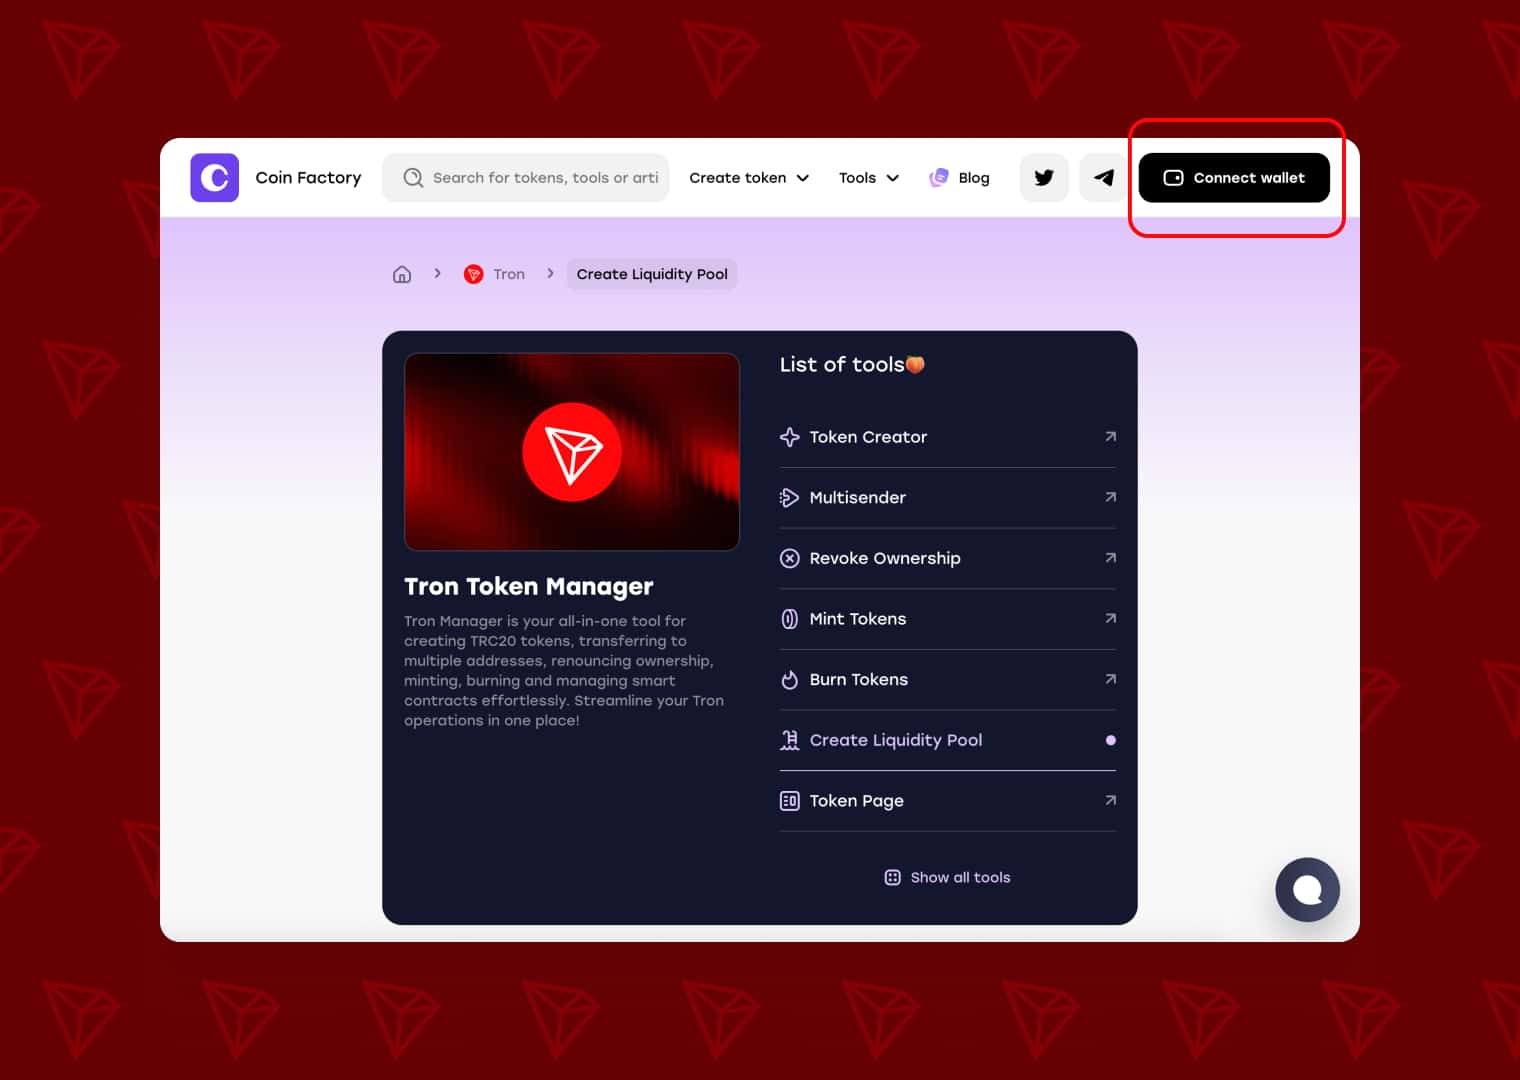
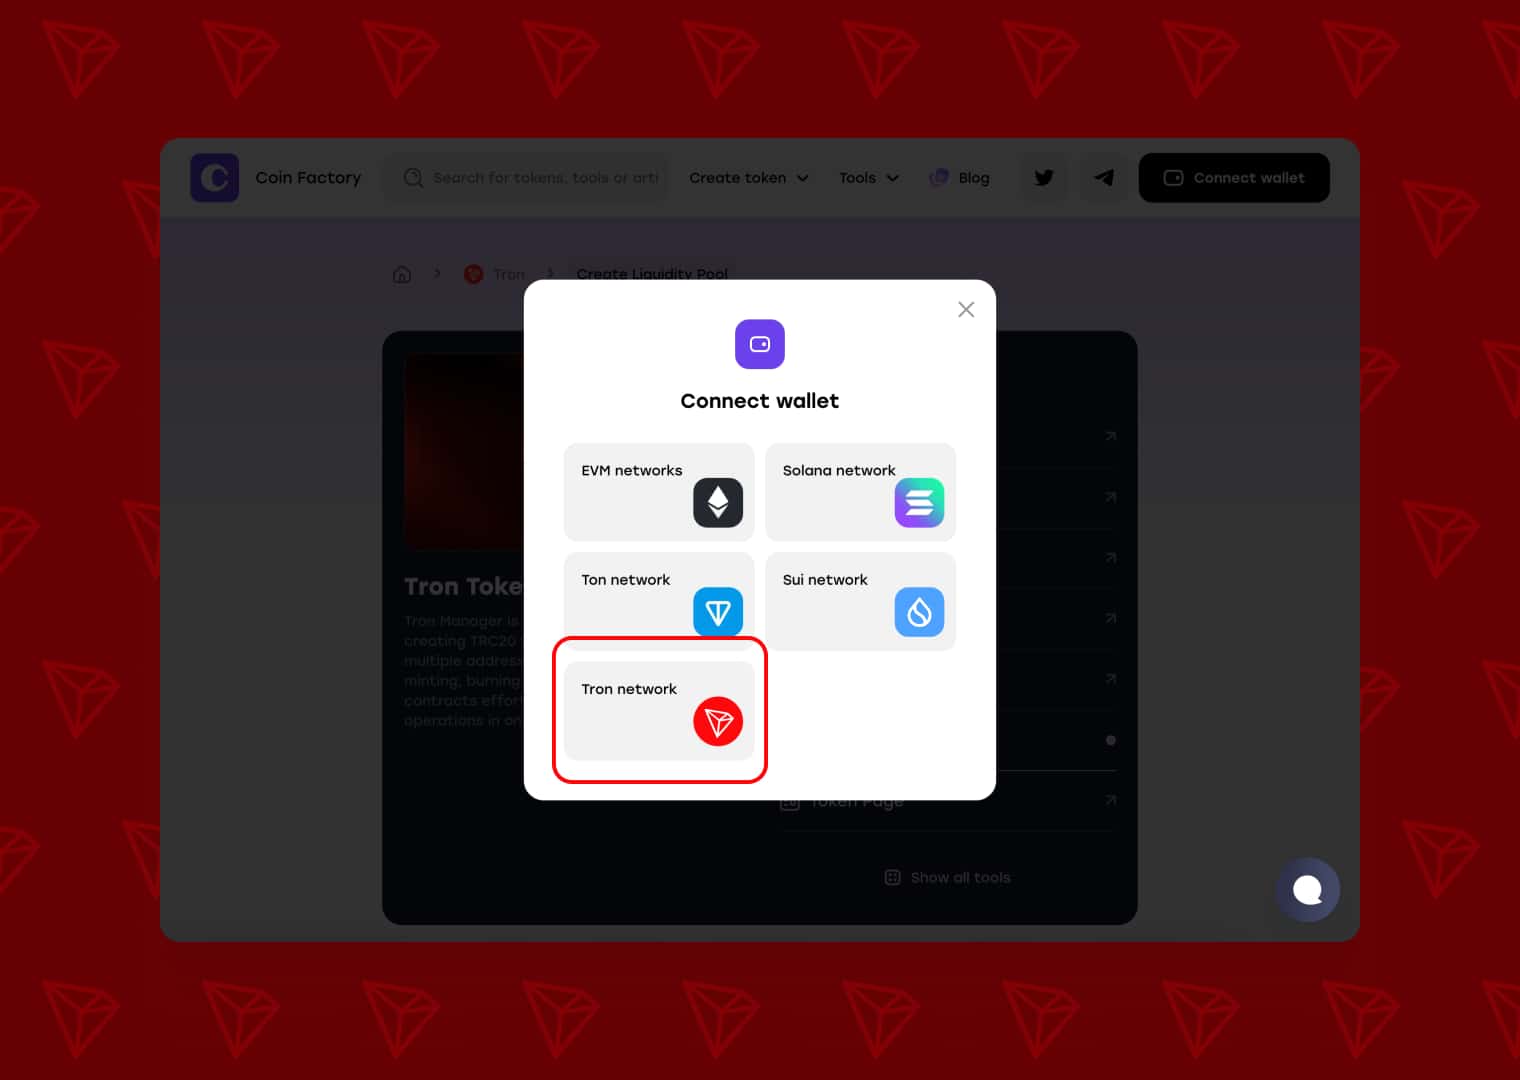
Step 2: Connect Your Wallet
Connect the TRON wallet that holds the tokens you want to add to the liquidity pool. Make sure the wallet also has enough TRX to provide liquidity and cover network transaction fees.
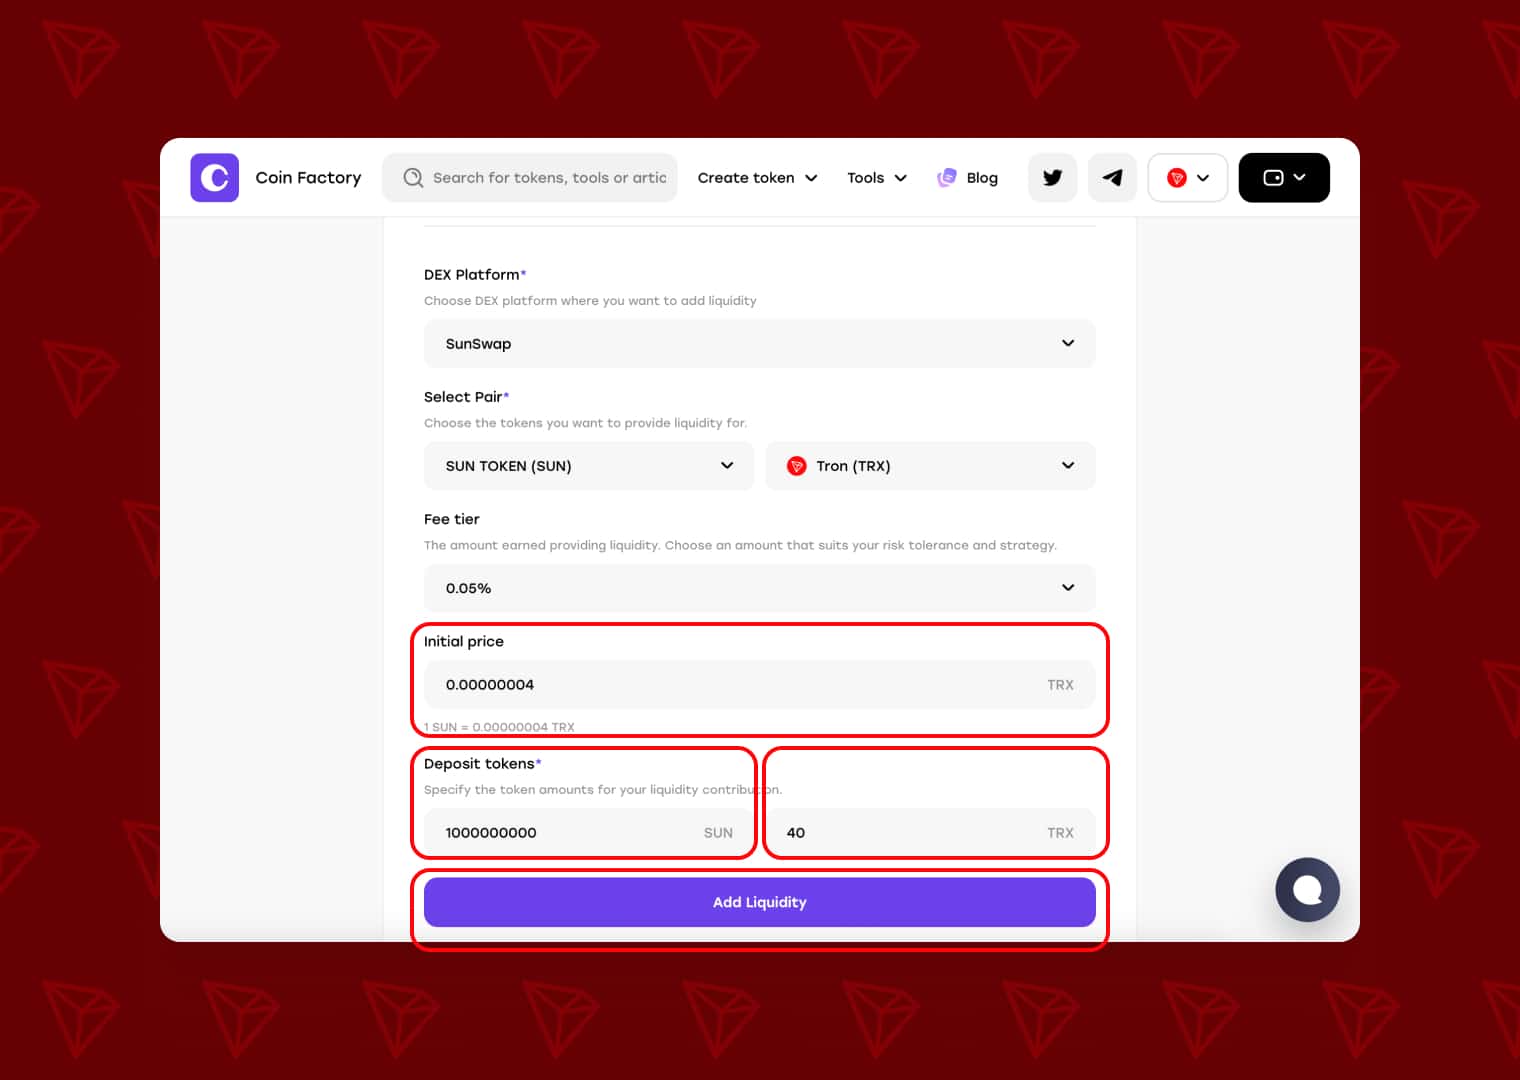
Step 3: Configure Your Liquidity Pool
Fill in the pool information and choose the parameters for your new liquidity pool:
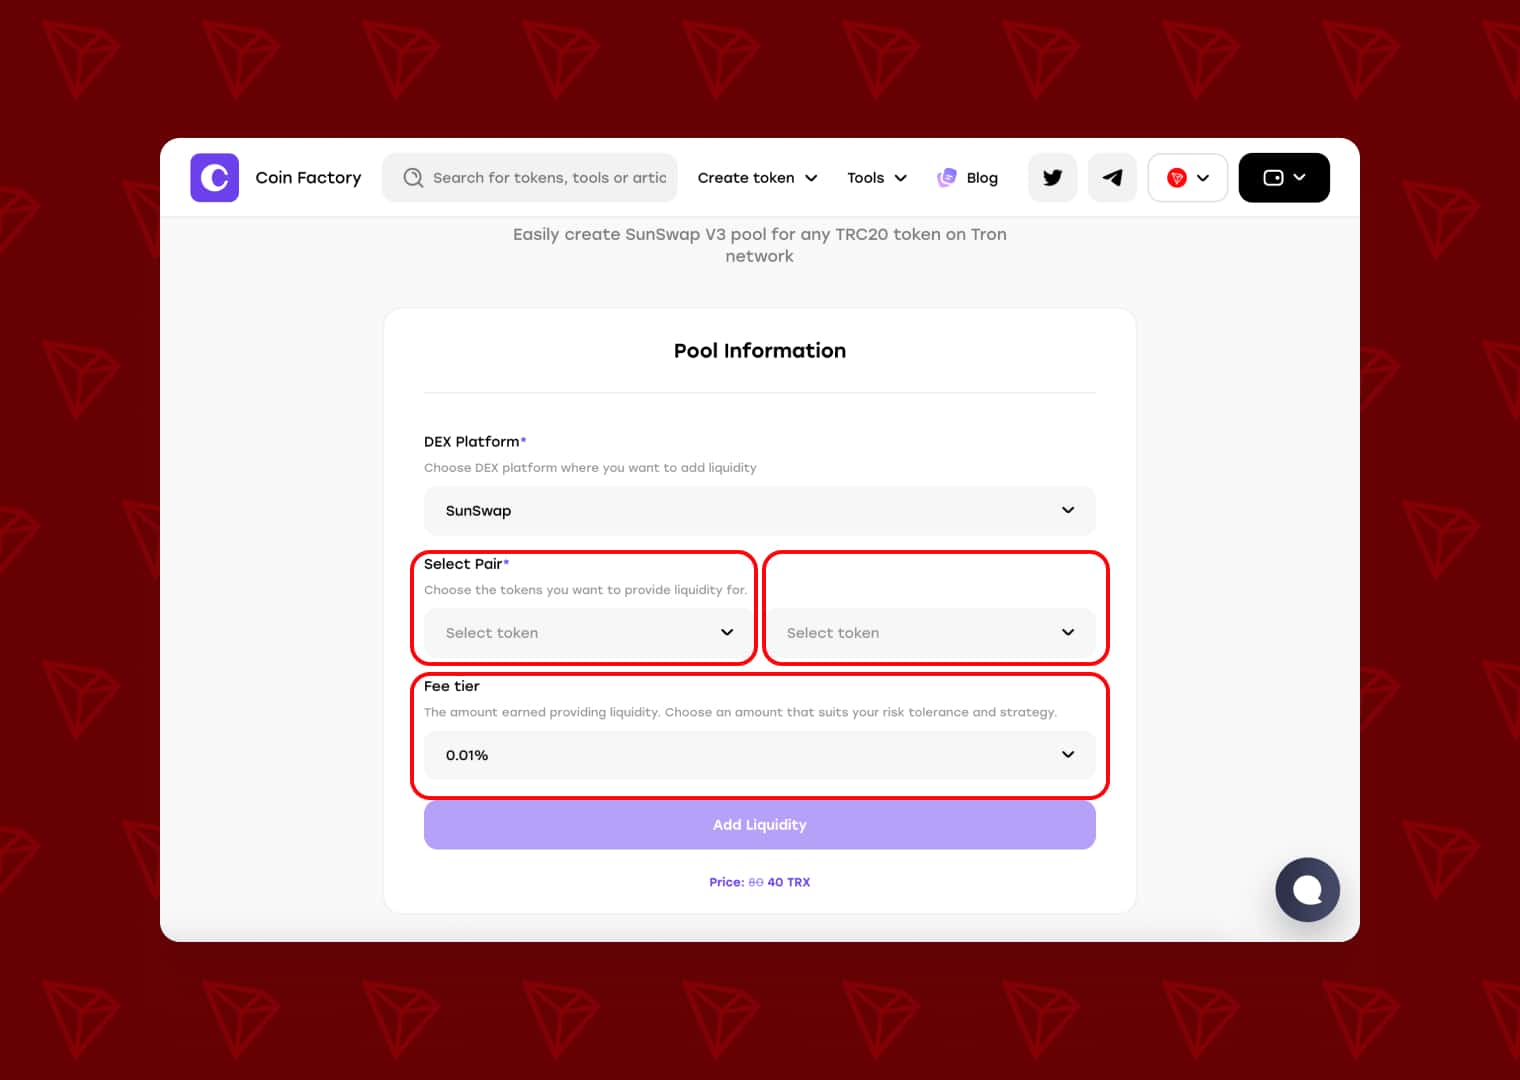
- DEX Platform — select the decentralized exchange where the liquidity pool will be created. Choose SunSwap for TRC-20 tokens.
- Select Pair — choose your TRC-20 token and the asset you want to pair it with, such as TRX.
- Fee Tier — select the trading fee charged on swaps through your liquidity pool. Liquidity providers earn fees from trading activity in the pool.
- Initial Price — set the starting price of your token relative to the paired asset. For example, if TRX is selected, this value determines how much TRX one token is initially worth.
- Deposit Tokens — enter the amount of your TRC-20 tokens you want to provide as liquidity. The required amount of TRX is calculated based on your Initial Price and token deposit. The higher the initial token price you set, the more TRX you will need to add to the pool.
Now configure your SunSwap V3 liquidity pool. You’ll need to select the token pair, choose a fee tier, set the initial token price, and specify how much liquidity you want to provide.
Select Your Token Pair
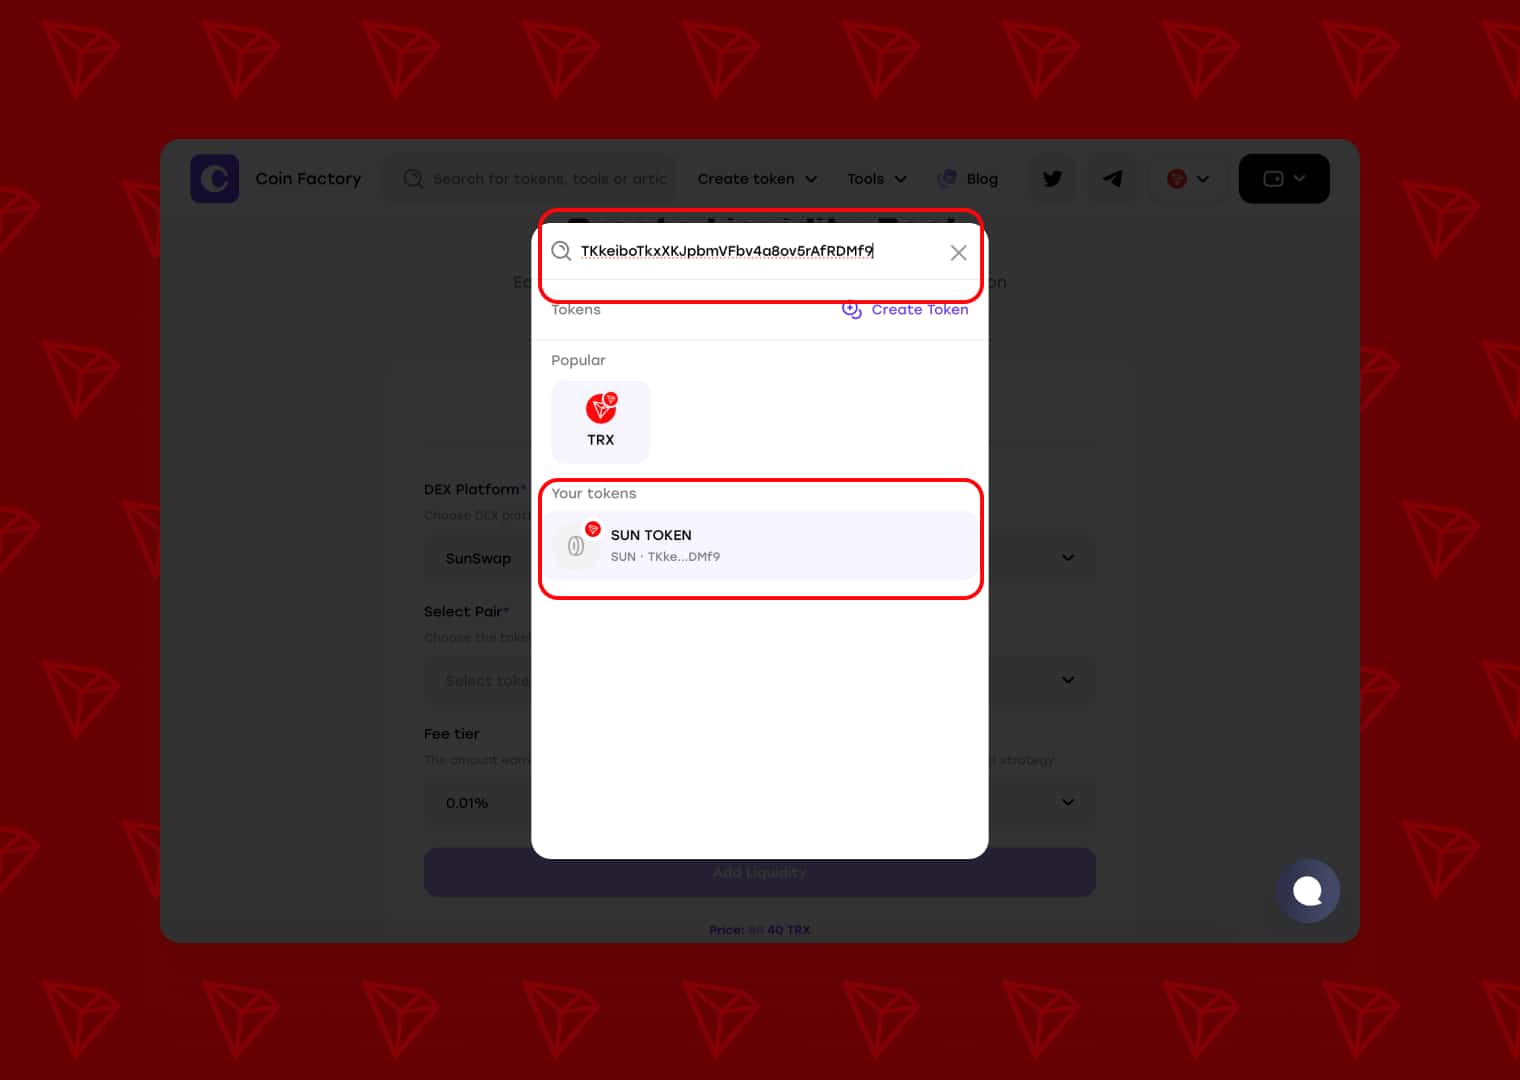
In the Select Pair section, choose the two assets that will form your liquidity pool.
Select your TRC-20 token in the first field and TRX as the paired asset in the second field.
If your token does not appear automatically, paste its TRC-20 contract address into the search field and select it from the results.
Choose the Fee Tier
Next, select the Fee Tier for your SunSwap V3 pool. This determines the fee charged on swaps and the amount liquidity providers can earn from trading activity.
Choose the fee tier that best fits your token and expected trading activity.
Set the Initial Price and Liquidity Amount
Enter the Initial Price of your TRC-20 token in TRX. This value determines the starting exchange rate when your liquidity pool is created.
Then enter the amount of your tokens you want to deposit into the pool. CoinFactory will calculate the corresponding amount of TRX required based on your initial price.
Important: The amount of TRX required depends directly on the initial price and the number of tokens you add. The higher the starting price you set for your token, the more TRX you will need to provide as liquidity.
Check all values carefully and click Add Liquidity.
Step 4: Confirm the Transaction
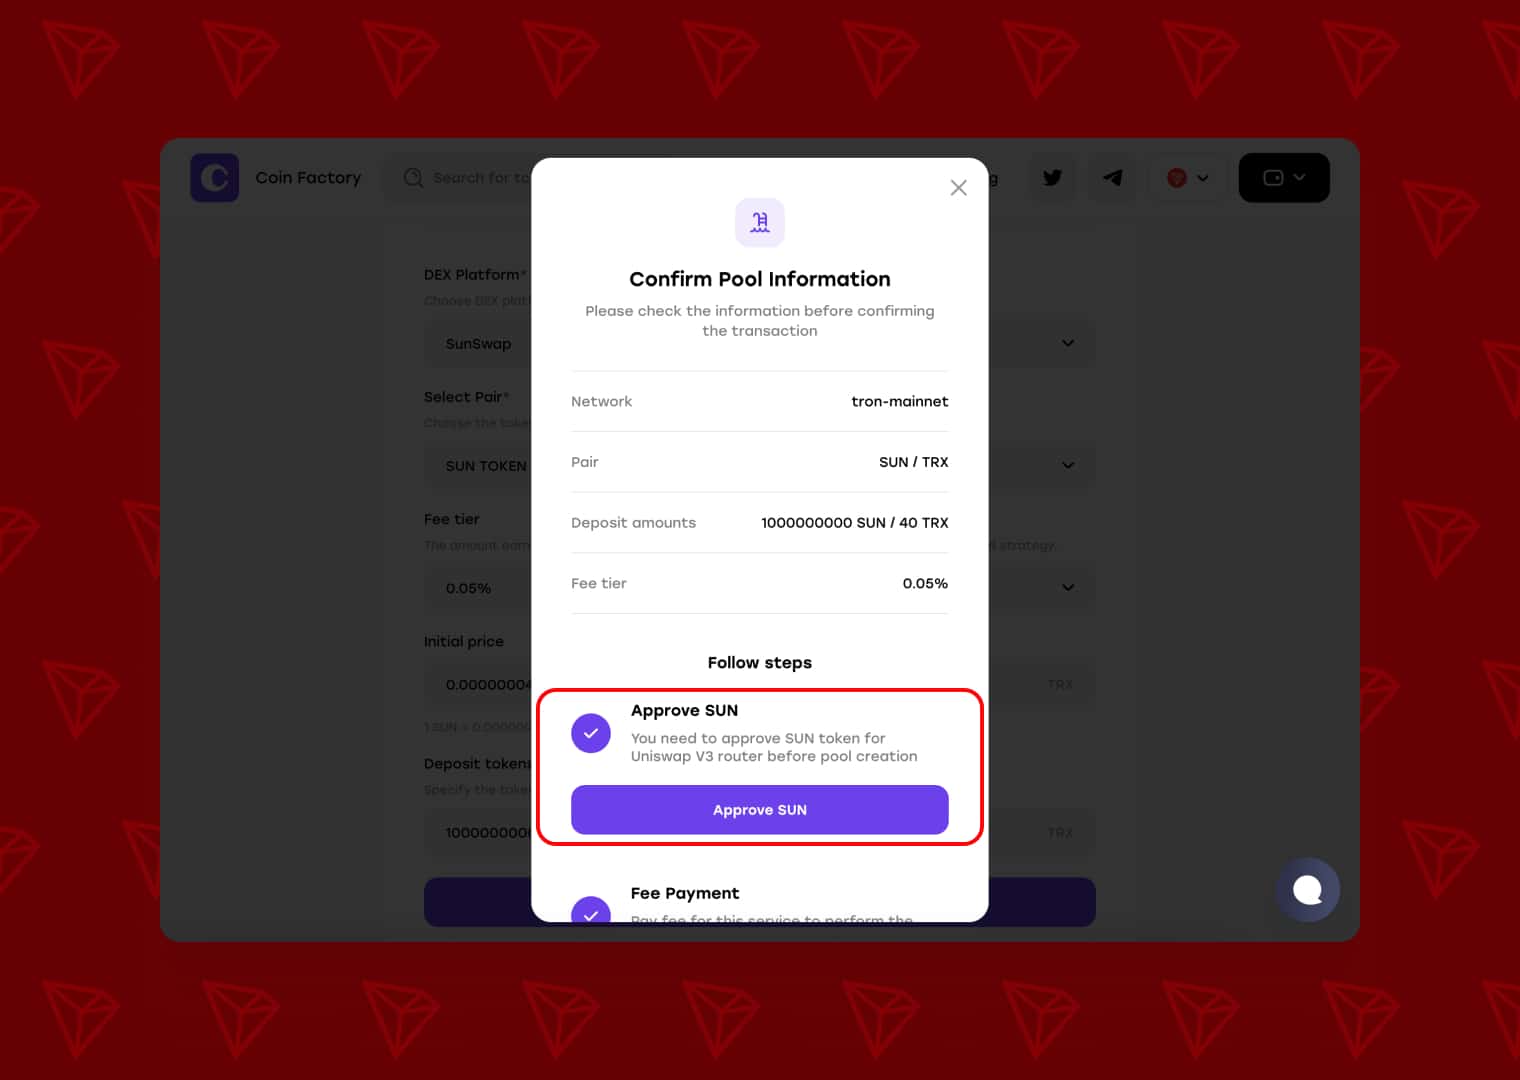
Approve Your Token
Review the pool information in the confirmation window. Before CoinFactory can add your TRC-20 tokens to the pool, you need to approve them for use by the SunSwap V3 smart contract.
Click Approve Token and confirm the approval transaction in your wallet.
Pay the Service Fee and Add Liquidity
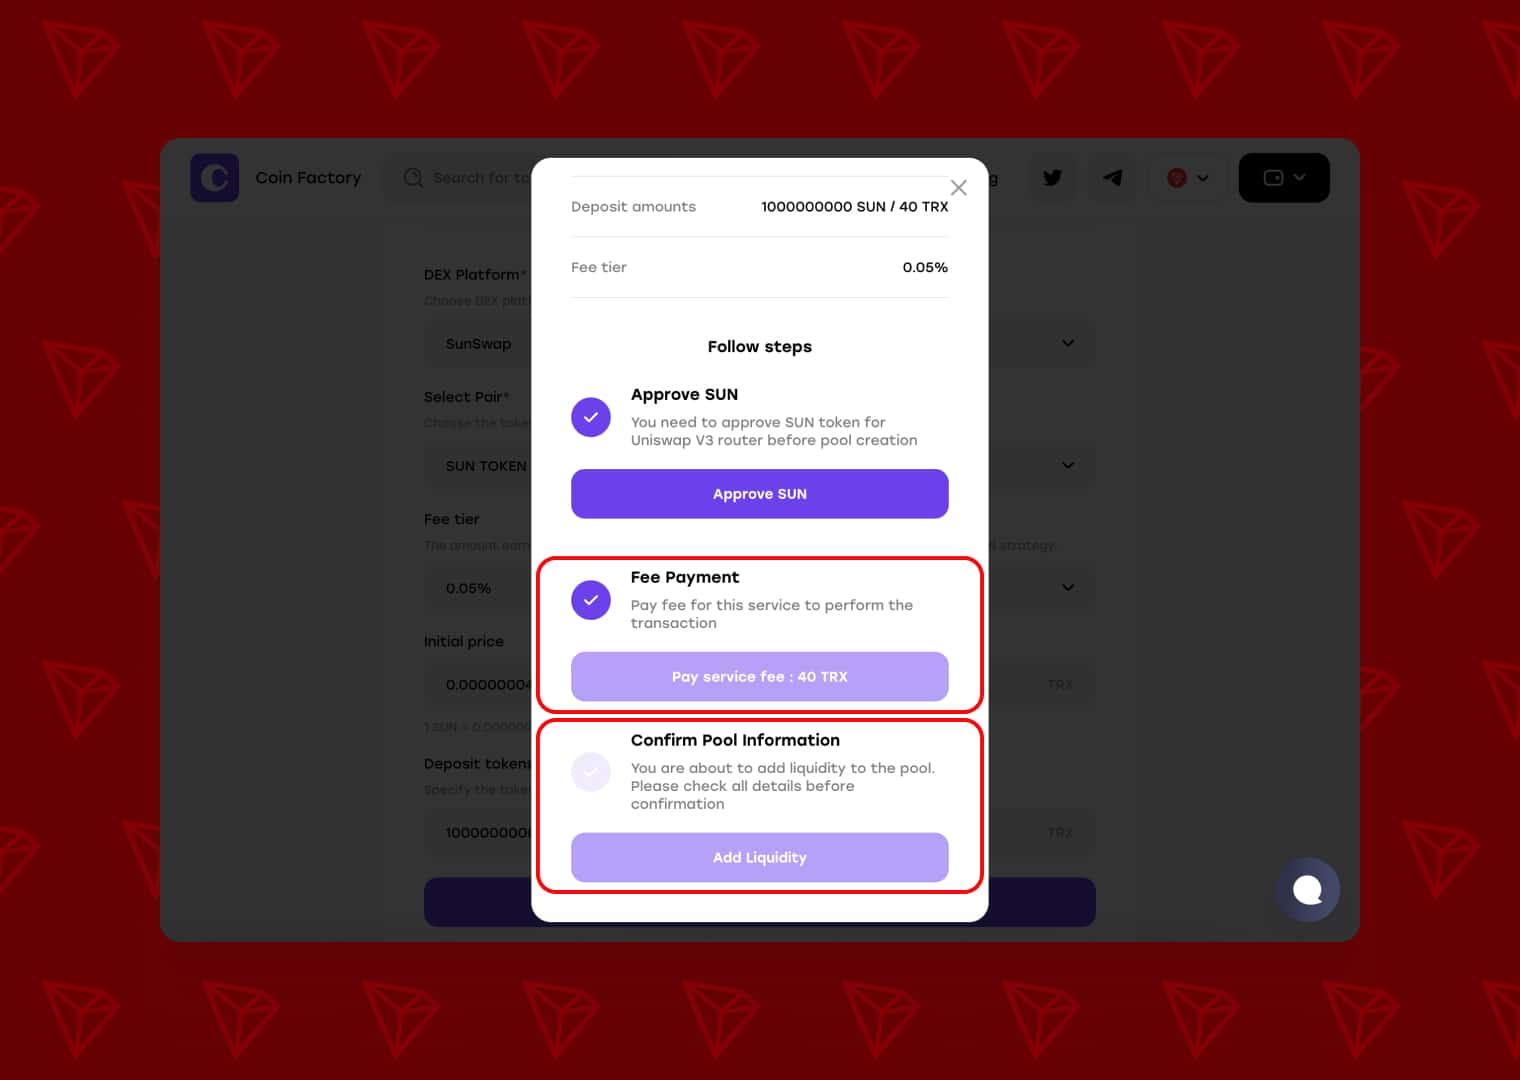
After approving your token, complete the Fee Payment shown in the confirmation window.
Finally, review the pool information once again and click Add Liquidity to proceed with pool creation.
Once these steps are completed, proceed to the final transaction confirmation in your TronLink wallet.
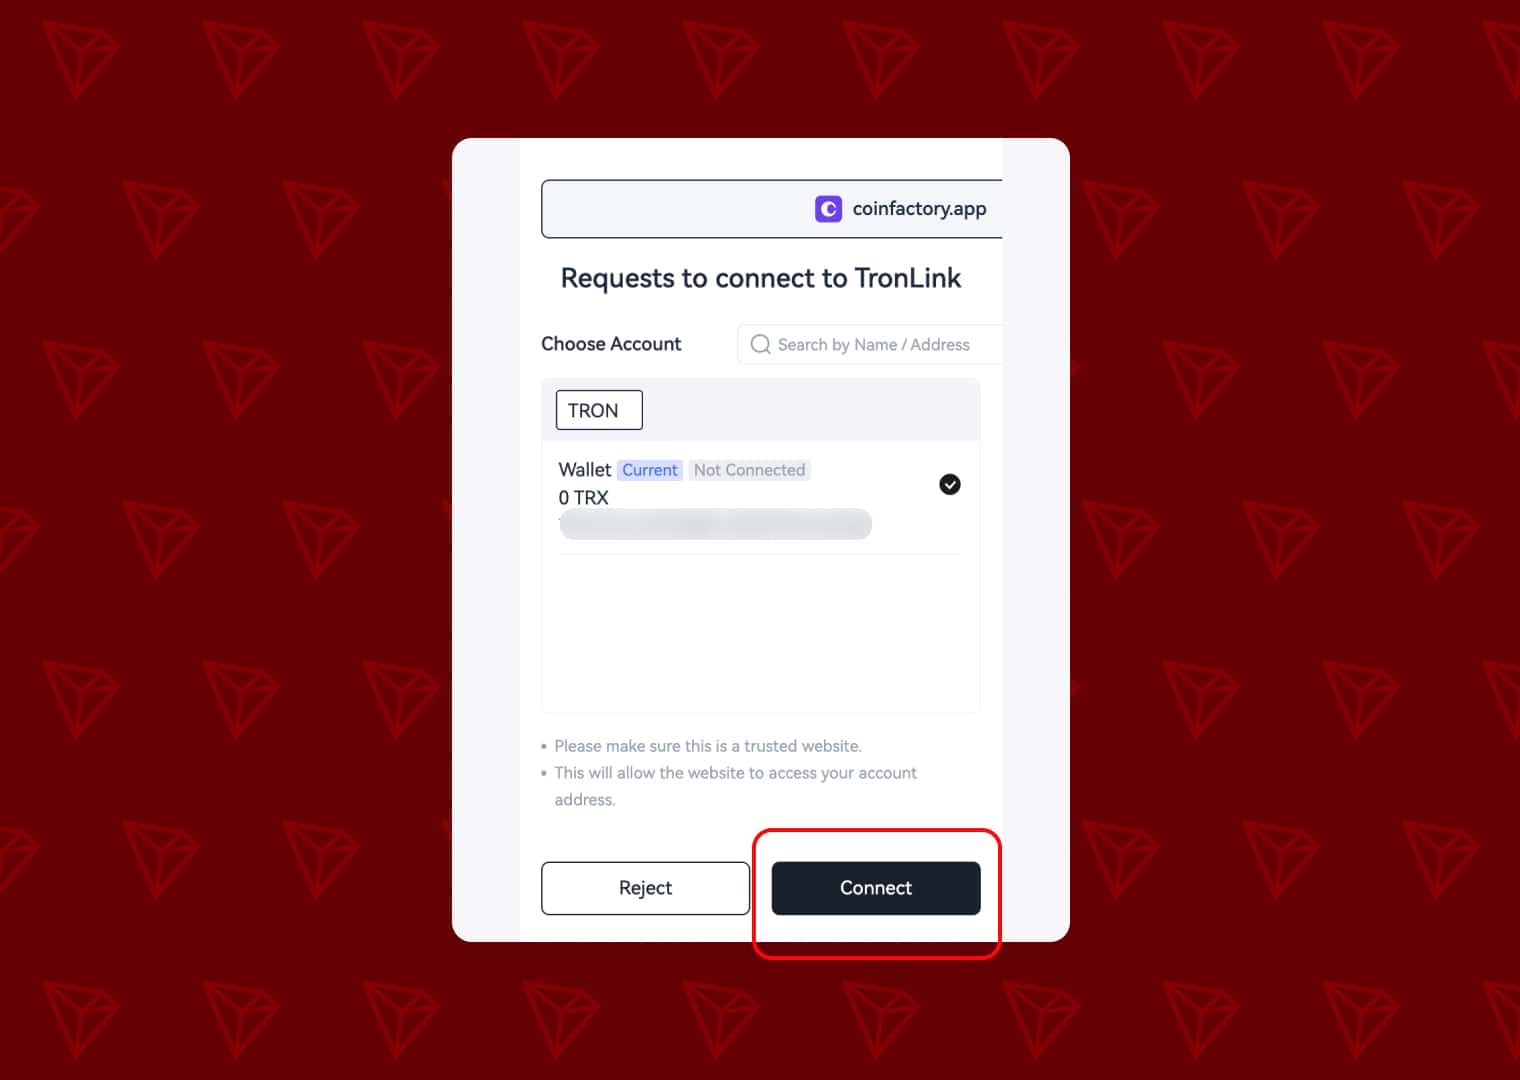
Once the transaction is successfully processed on the TRON Network, your SunSwap V3 liquidity pool will be created and liquidity will be added to it.
Conclusion
Creating a liquidity pool is an essential step if you want your TRC-20 token to be tradable on a decentralized exchange. By adding liquidity, you establish an initial token price and make it possible for users to buy and sell your token.
With CoinFactory, you can create a SunSwap V3 liquidity pool on the TRON Network in just a few steps—connect your wallet, configure the pool, add liquidity, and confirm the transaction. No coding or manual smart contract interaction is required.
Tags

Guide
Tron
Trc20 liquidity
Tron pool
Sunswap v3
Liquidity pool


