


How to Create a Token on Arc Network in 4 Steps (WITHOUT CODING)
Create your own token on Arc Network without coding. Use CoinFactory to configure your token, deploy an ERC-20 smart contract, and pay network fees directly in USDC.
 CoinFactory
Create Your Own Token on Arc Network
Arc is an EVM-compatible Layer 1 blockchain developed by Circle and designed around stablecoin-powered financial applications and onchain markets. Unlike most EVM networks, Arc uses USDC for network gas fees, so users can interact with smart contracts without holding a separate volatile asset just to pay for transactions.
With fast finality, familiar Ethereum tooling, and native integration with Circle’s stablecoin infrastructure, Arc provides a new environment for launching tokens and building onchain products.
Creating a token manually normally requires writing, testing, and deploying a smart contract. CoinFactory removes these technical steps and lets you configure and deploy your token directly from a simple interface.
Why Launch a Token on Arc?
- 💵 USDC Gas Fees — deployment and network transactions are paid in USDC instead of a separate gas token.
- ⚡ Sub-Second Finality — Arc is designed to provide fast, deterministic transaction settlement.
- 🔗 EVM Compatible — tokens use familiar Ethereum standards and work with existing EVM infrastructure.
- 🌐 Built for Onchain Finance — Arc is designed around payments, stablecoins, asset issuance, trading, and other financial applications.
- ⚙️ Flexible Token Contracts — choose between simple fixed-supply tokens and contracts with additional management functionality.
- 🚀 No Development Required — deploy your token through CoinFactory without writing Solidity or configuring a development environment.
How to Create an Arc Token
The entire process takes four steps. You only need an EVM-compatible wallet and enough USDC on Arc to cover the token creation and network fees.
Step 1: Open the CoinFactory Arc Token Generator
Go to the CoinFactory Arc Token Generator to begin.
There is no need to prepare smart contract code or use developer tools. Token configuration and deployment are handled directly through the CoinFactory interface.
Step 2: Connect an EVM Wallet
Click Connect Wallet and choose the wallet you want to use to deploy and manage your token.
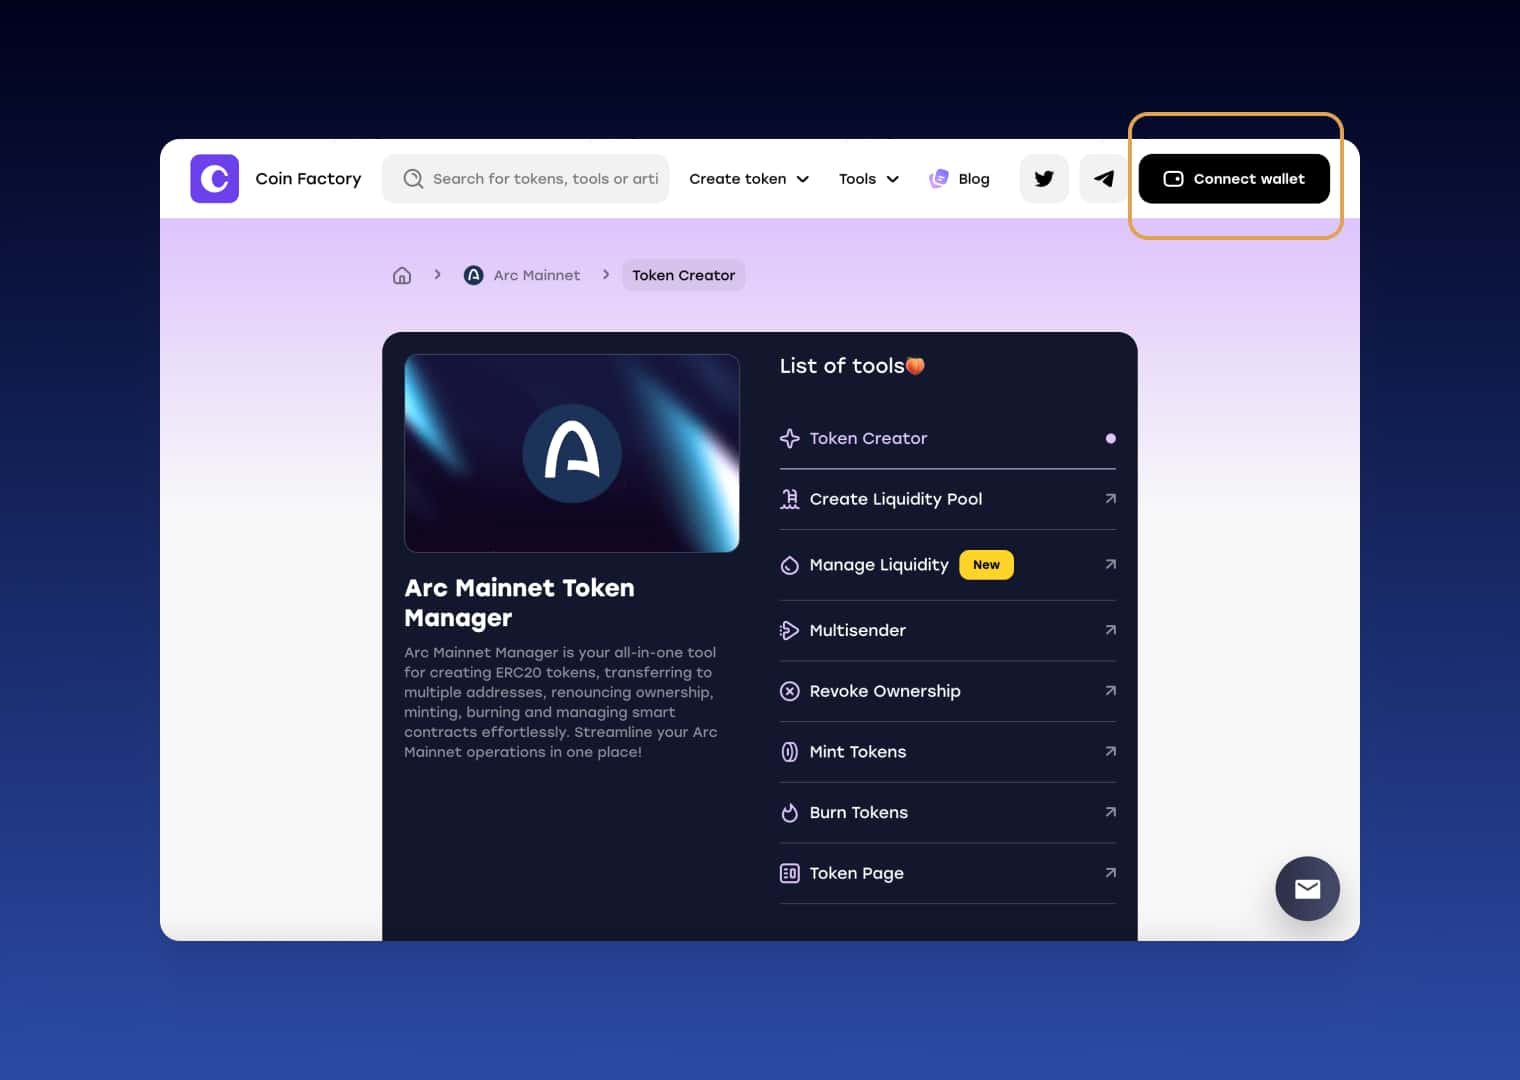
Make sure your wallet is connected to Arc Network before continuing. The connected address will be used to sign the deployment transaction and receive the initial token supply.
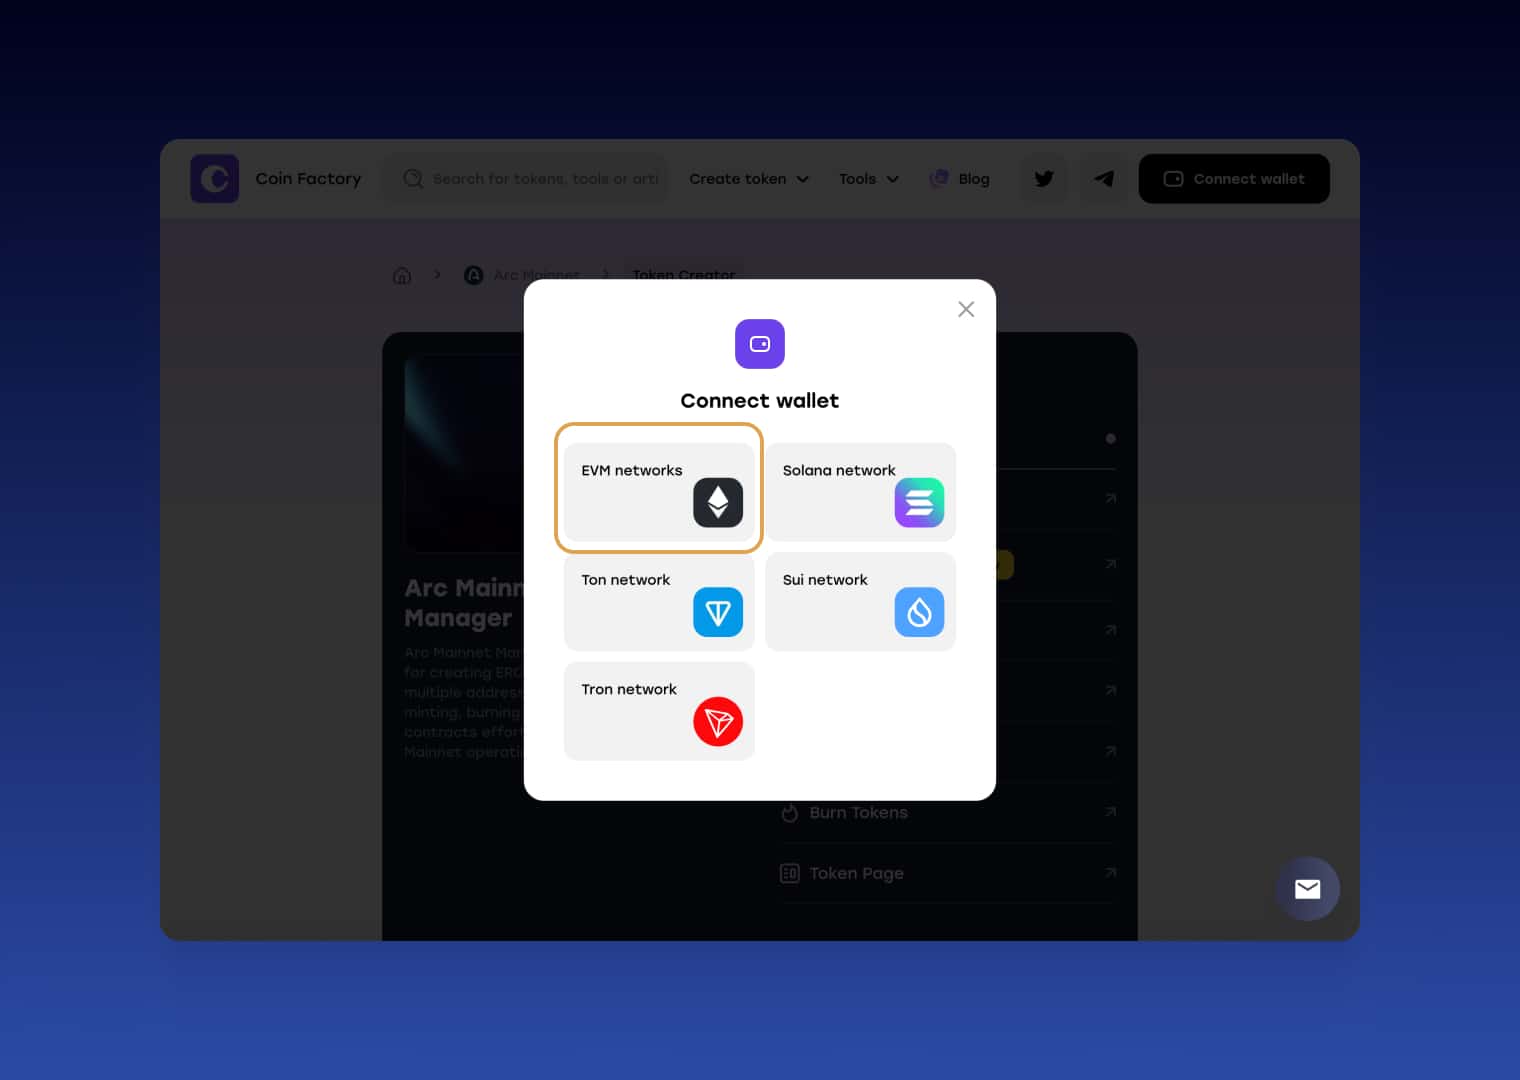
One important difference from many other EVM networks is that Arc uses USDC for gas. Make sure your wallet has enough USDC on Arc before creating the token.
Step 3: Choose Your Token Template
Choose the token template that best fits your project and the features you need.
- Standard — A simple and affordable token for basic use cases with a fixed supply and minimal contract functionality.
- Essential — A flexible token with additional management features, including minting, burning, transfer controls, wallet management, and ownership functions.
- Taxable — An advanced token template that allows you to configure transaction taxes along with additional token management features.
- Meme Token — A trade-ready token powered by Uniswap V4. Your token is automatically launched for trading on a DEX, with creator rewards earned from every trade. No manual liquidity setup is required, and there are no post-launch contract controls.
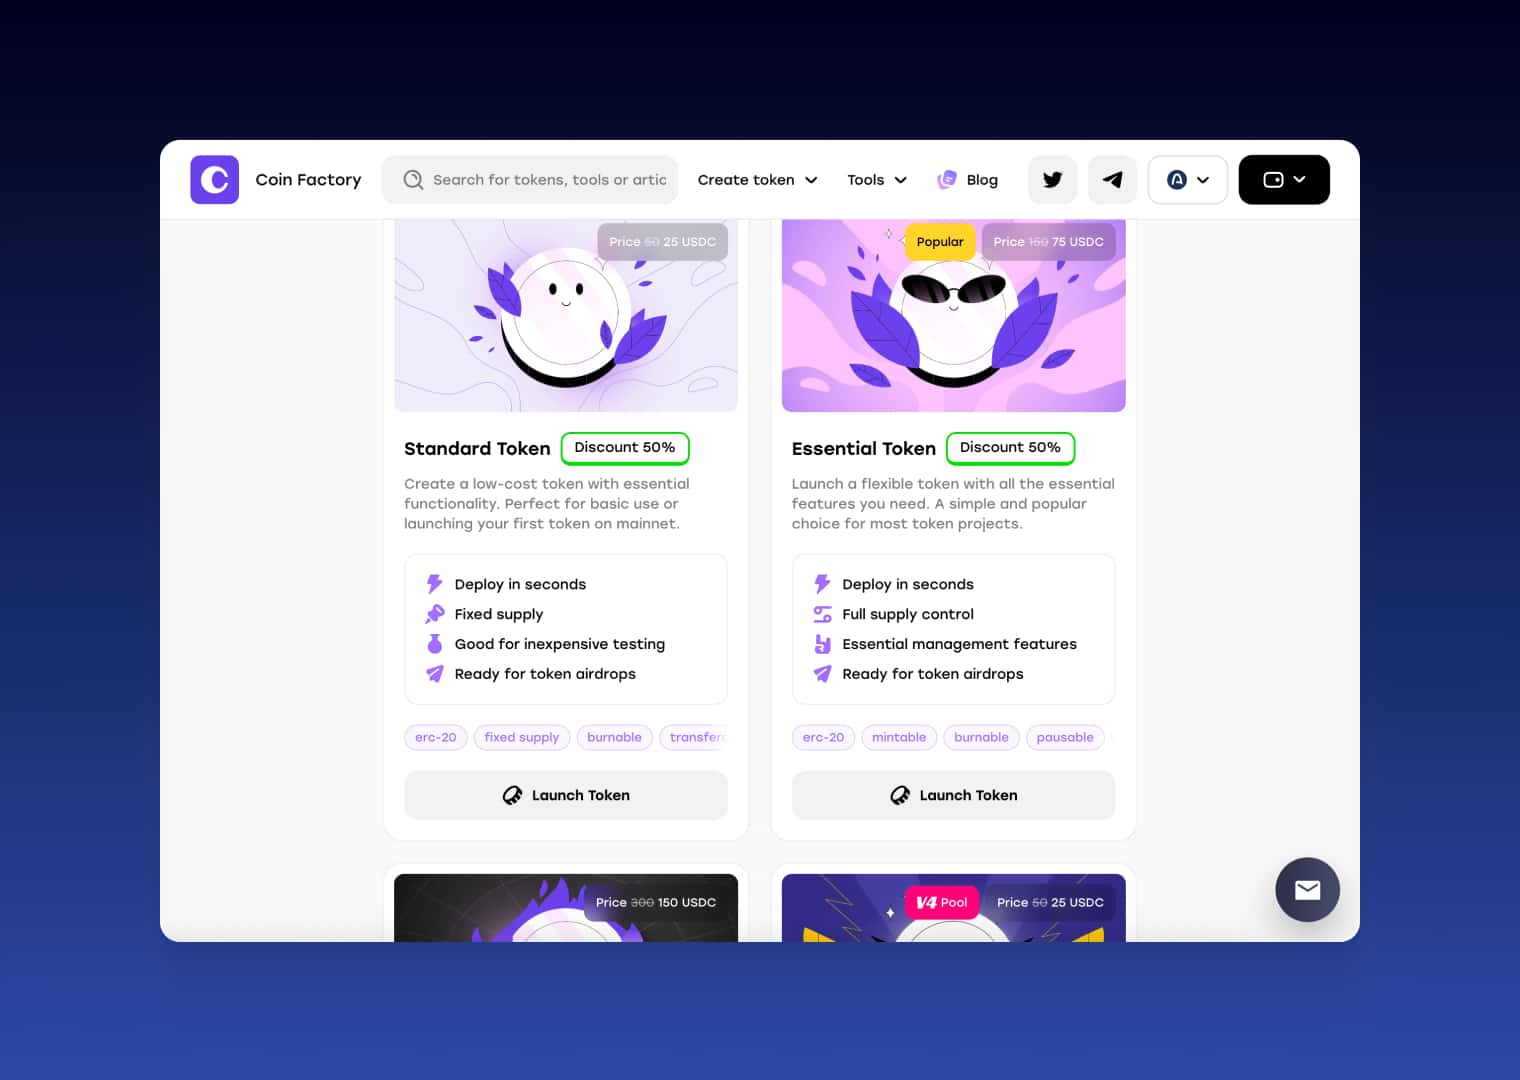
Step 4: Configure and Deploy Your Arc Token
After selecting a template, complete the token configuration and deploy it to Arc Mainnet.
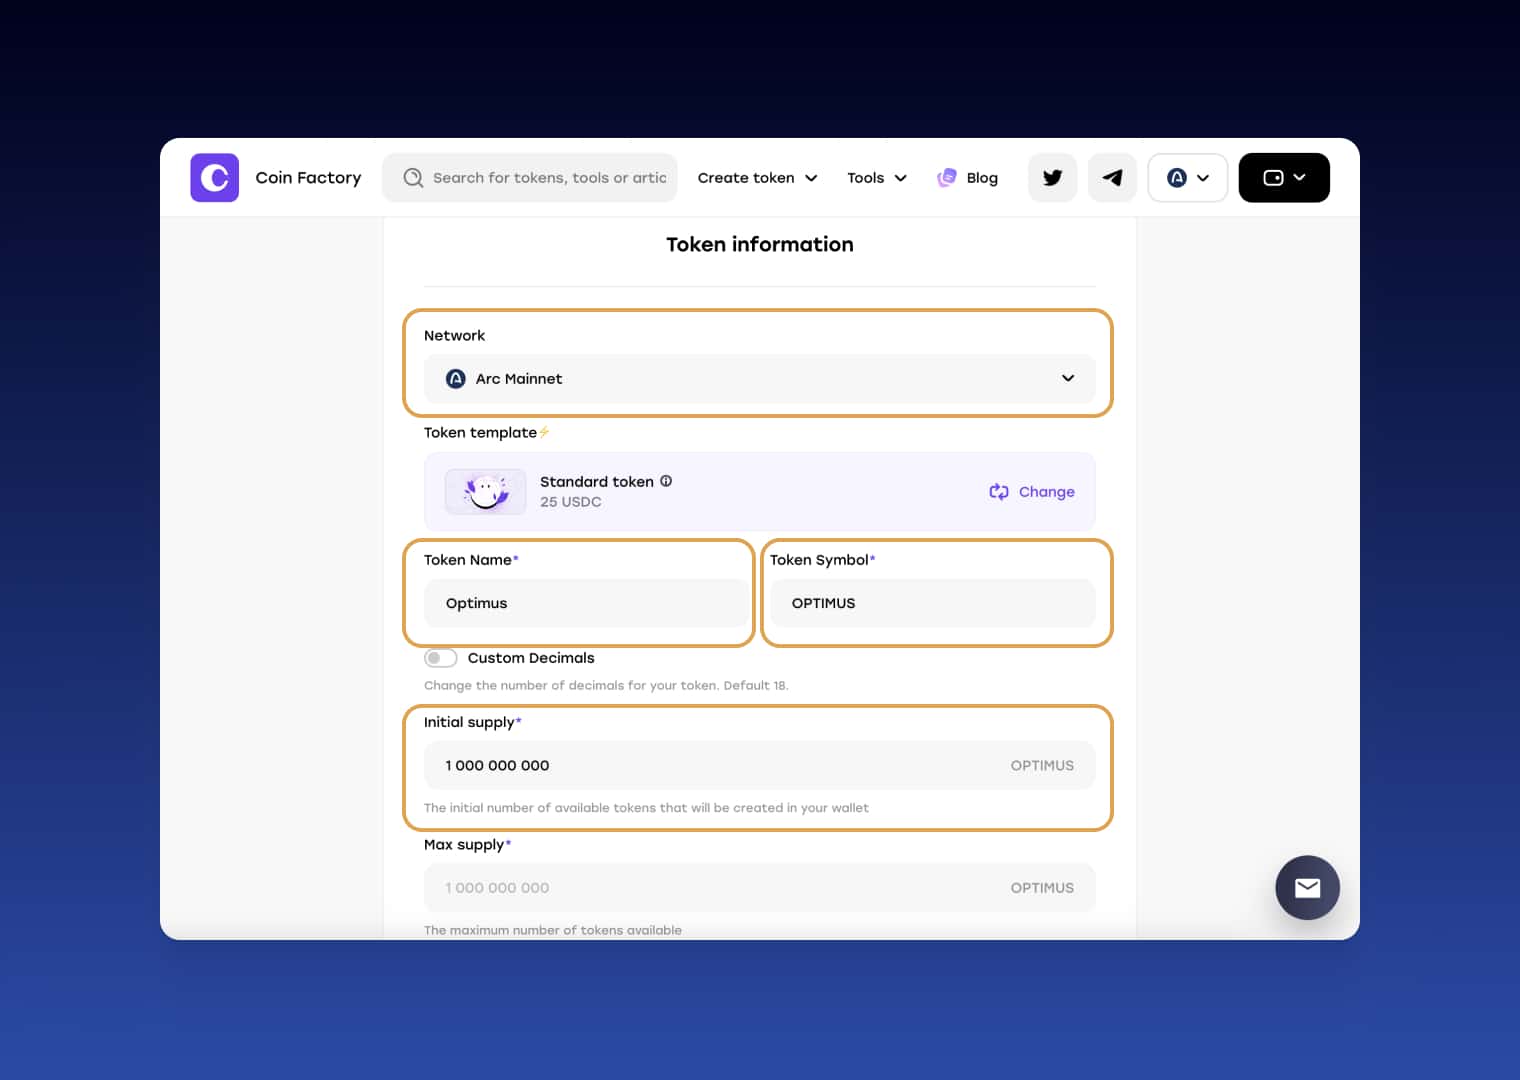
1. Enter your token details
Make sure Arc Mainnet is selected, then enter your Token Name, Token Symbol, and Initial Supply. You can also customize the number of decimals if needed. The connected wallet address will be used as the token owner.
2. Customize your token page (optional)
If you enable Create Token Page, you can add your project's social links, including your website, X (Twitter), Telegram, Discord, YouTube, Medium, GitHub, Instagram, Reddit, and Facebook.
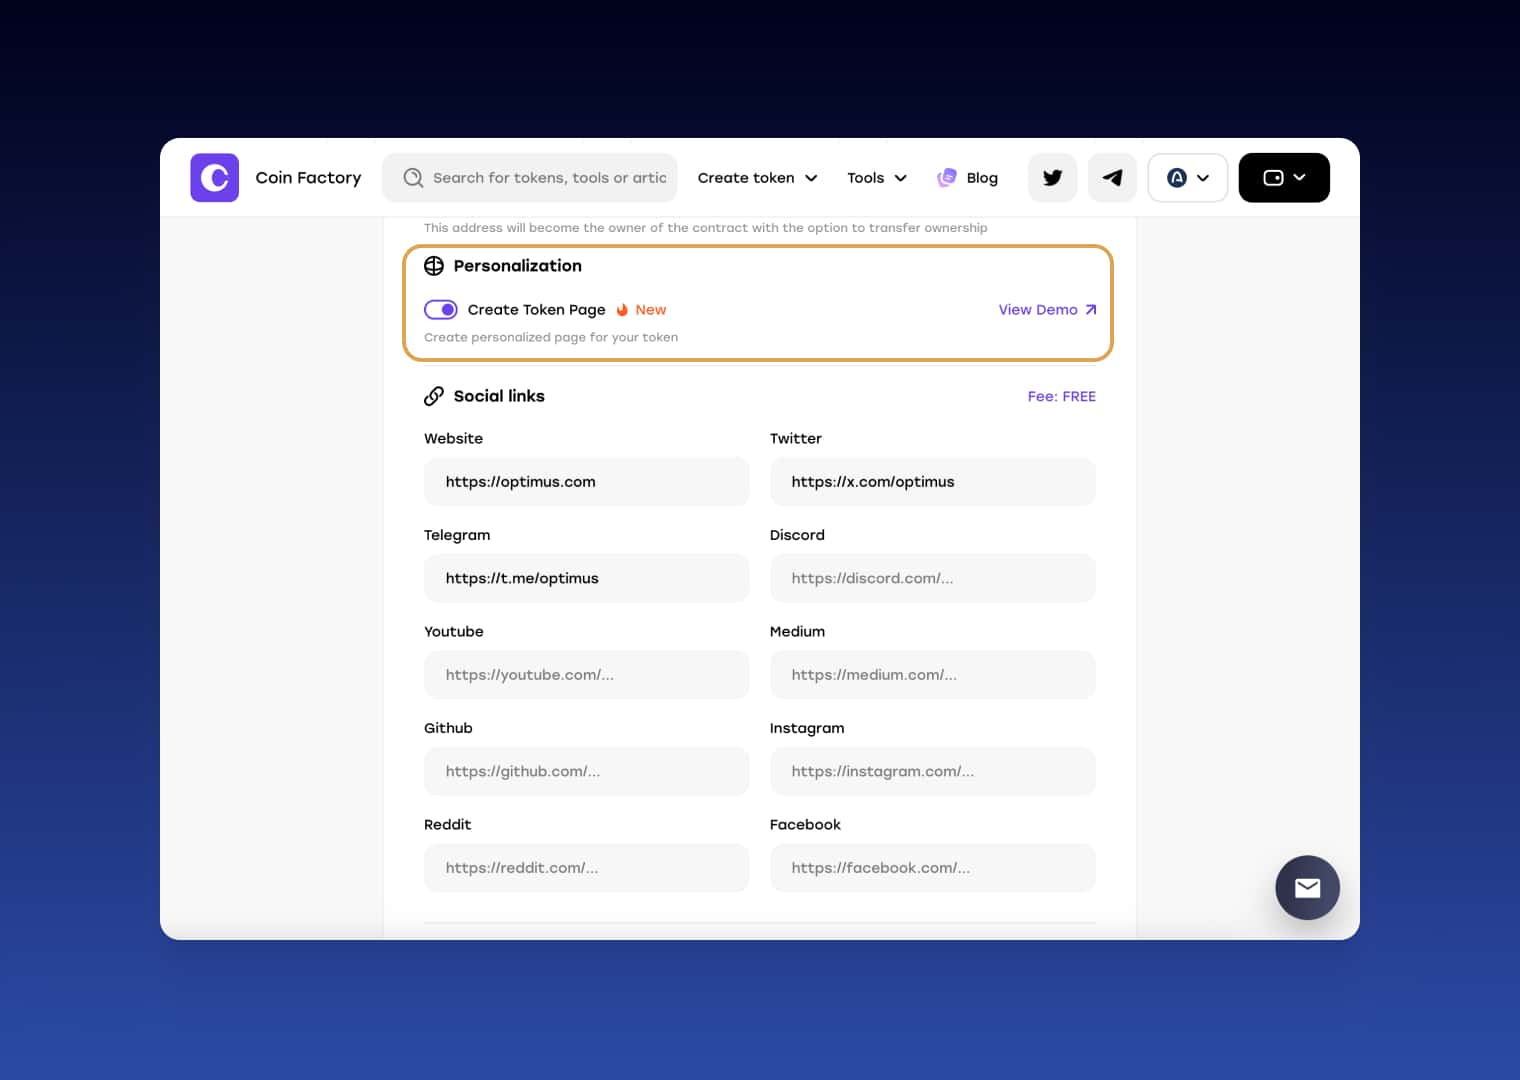
You can also add optional sections such as Team, Tokenomics, and Roadmap to provide more information about your project.
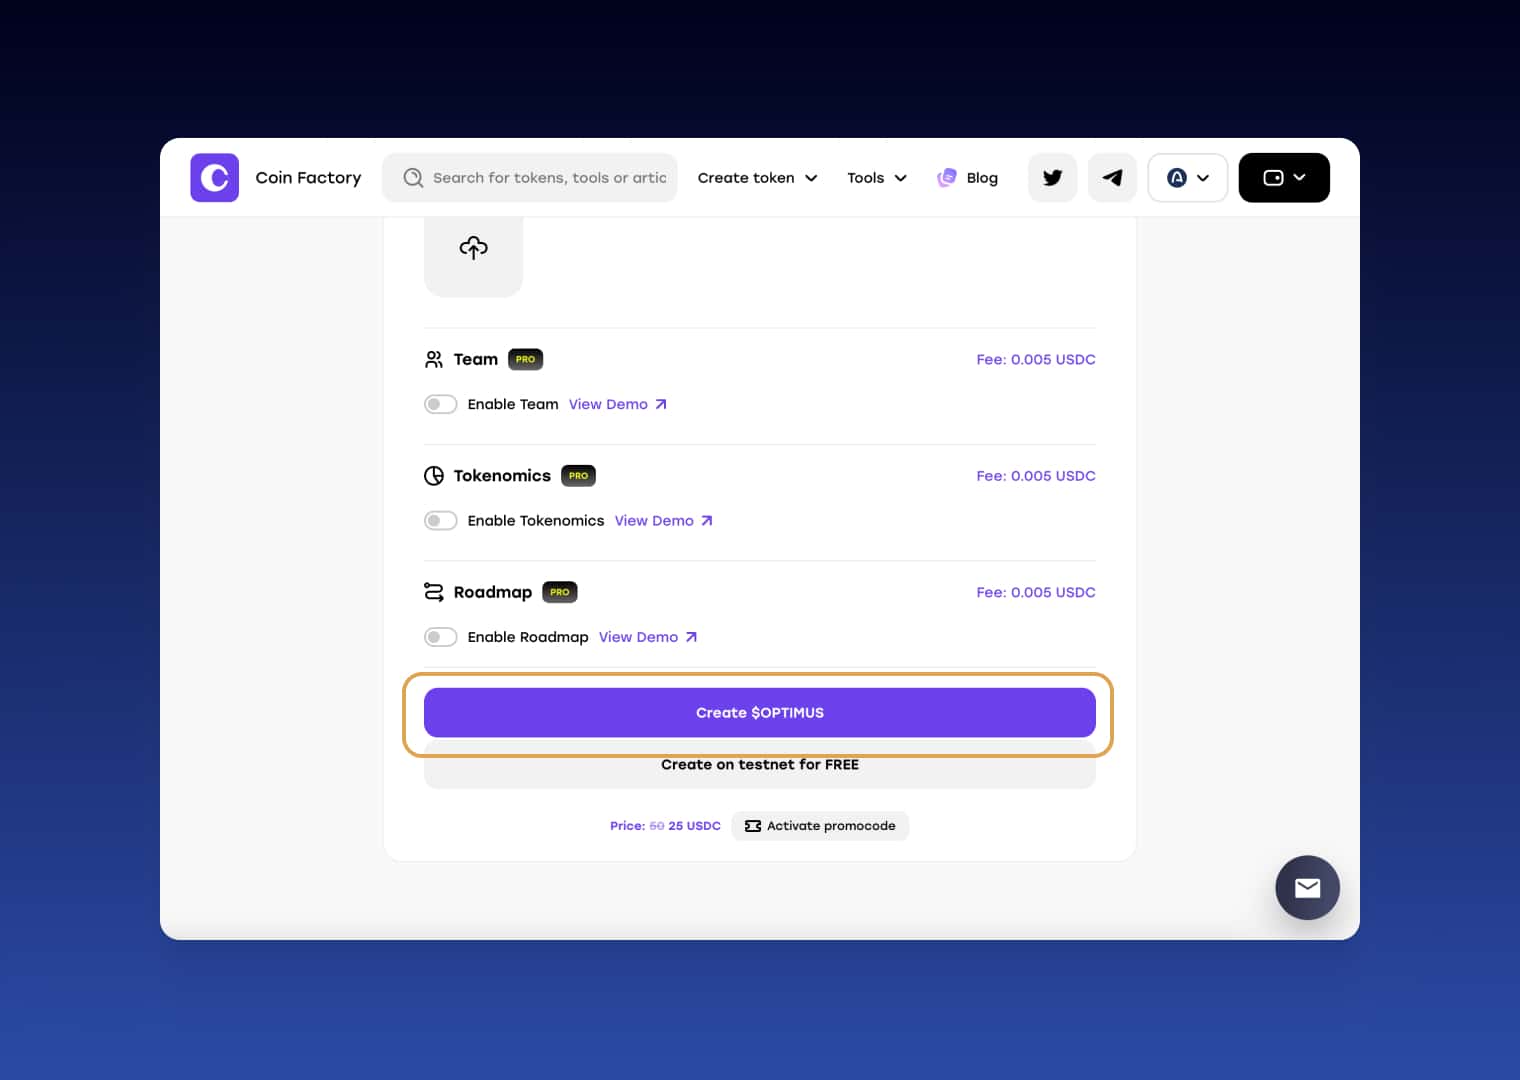
3. Review the settings and create your token
Scroll down and review your token settings. You can optionally enable Create Token Page to create a dedicated page for your token.
When everything is ready, click Create Token. CoinFactory also allows you to deploy the same configuration on the Arc testnet for free before launching on mainnet.
4. Confirm the deployment
Before deployment, CoinFactory will show a final confirmation screen with your network, token type, name, symbol, decimals, supply, owner address, and additional sections.
Check the information carefully and click Deploy contract. Confirm the transaction in your connected wallet to deploy the smart contract on Arc Mainnet.
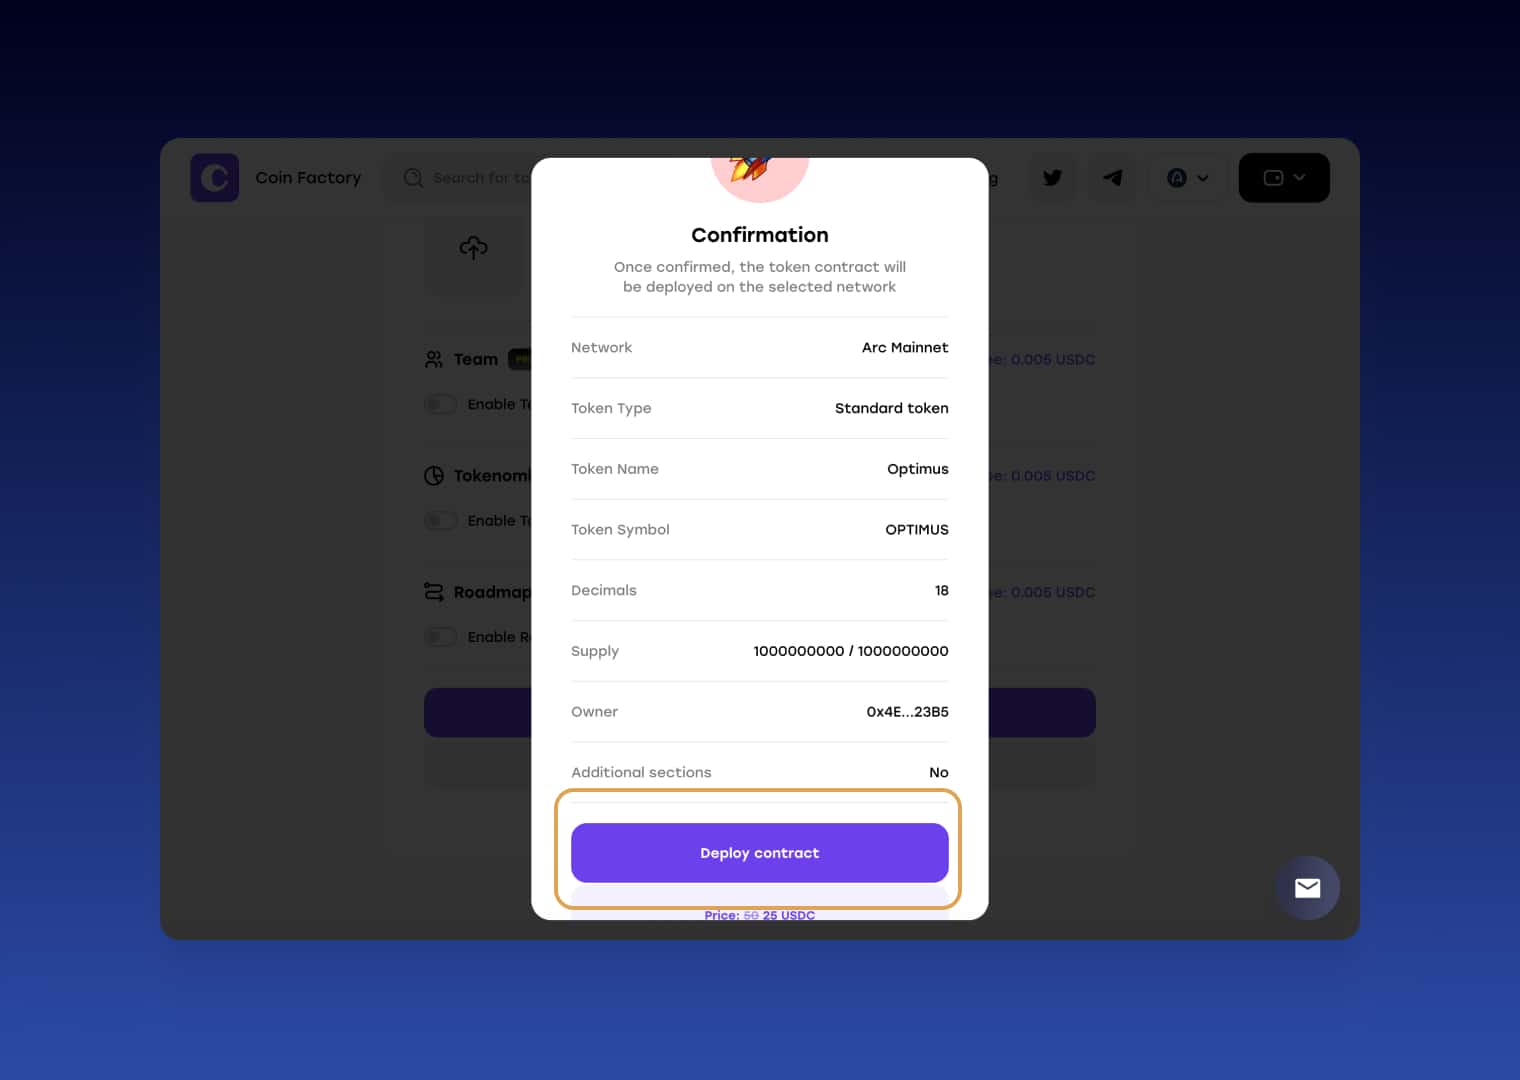
Once the transaction is confirmed, your Arc token is live on-chain and ready to use.
Your Arc Token Is Ready — What’s Next?
Deployment is only the first step. Once your token is live, you can distribute it between wallets, integrate it into your project, create liquidity, or use available contract management functions depending on the template you selected.
Because Arc is EVM-compatible, developers can also integrate the token with applications and infrastructure built around familiar Ethereum standards.
Conclusion
Launching a token on Arc does not require building a Solidity contract from scratch. With the CoinFactory Arc Token Generator, the deployment process is reduced to choosing a contract template, entering your token parameters, and confirming the transaction from your wallet.
Arc also offers an unusual advantage for an EVM network: USDC is used to pay gas fees, giving token creators predictable dollar-denominated transaction costs without requiring a separate native asset for gas.
Whether you are experimenting with Arc or preparing a larger onchain project, CoinFactory provides a straightforward way to deploy and manage your token without writing code.
Tags

Guide
Arc
Token creator
Launch token
Erc-20 token


